Post Deploy Configuration
After initial deployment we will need to configure some additional settings before we can integrate our proxy with Azure Active Directory.
Set Proxy Domain Name
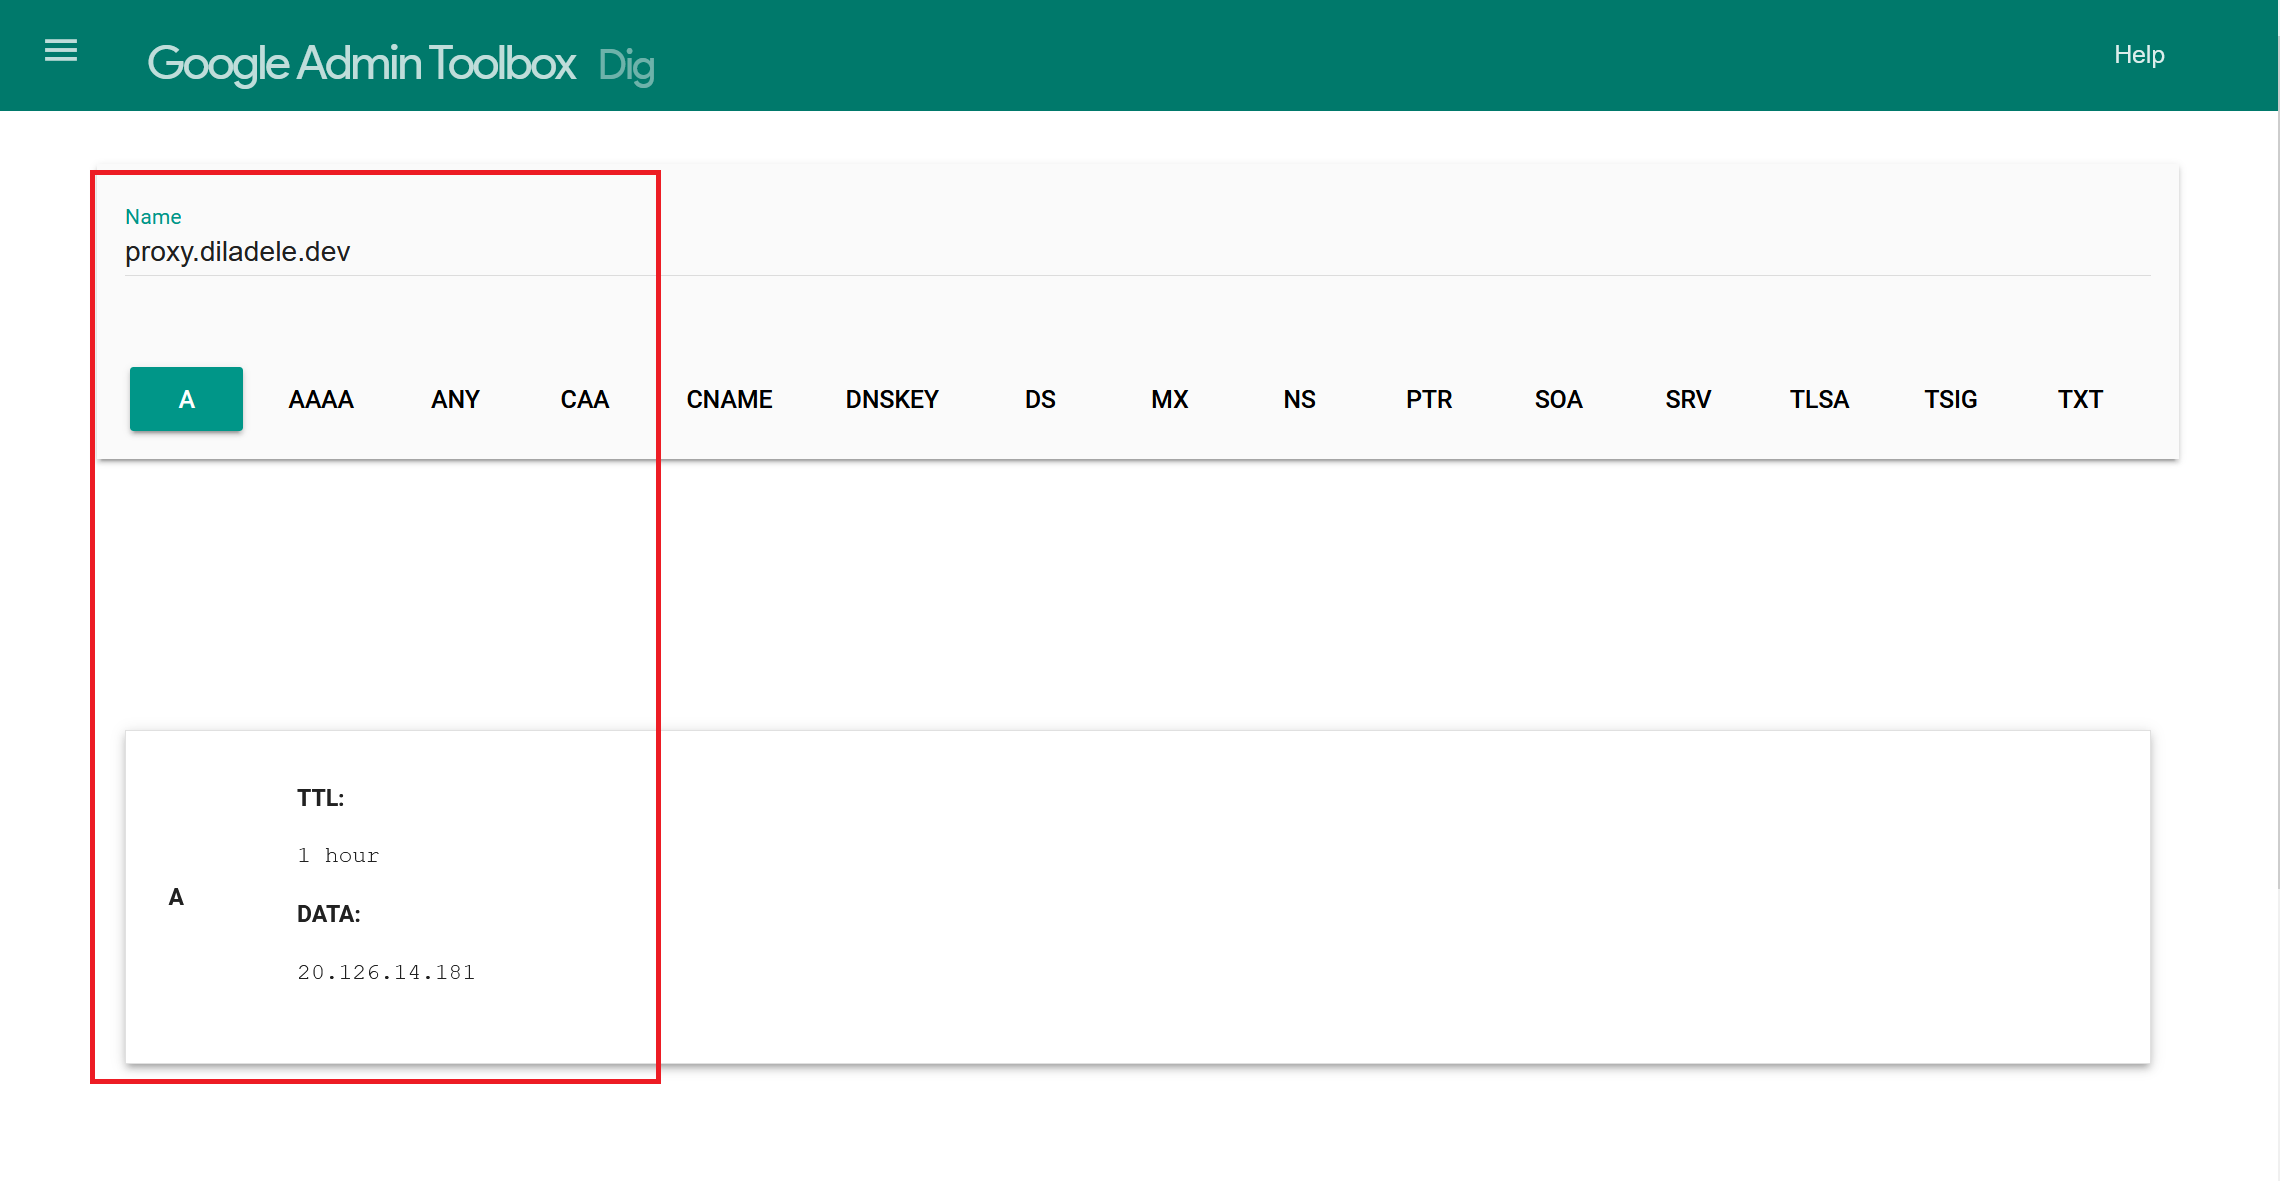
First thing to do is to assign a proxy.diladele.dev domain name to our virtual machine. How this is done largely depends on your DNS provider and as we use Azure DNS Management application for our development lab it is quite simple - just add the A record for proxy in diladele.dev DNZ zone.
Checking with Google DNS toolbox gives us the following.
Arrange the Certificate
Our proxy will later be setup to use the Captive Portal authentication with Microsoft Azure Active Directory, so we need to obtain a public TLS certificate for our proxy name.
There are several free options to arrange such certificate from various providers, for example, Lets Encrypt but for the purpose of this tutorial it was easier to get one time certificate from ssls.
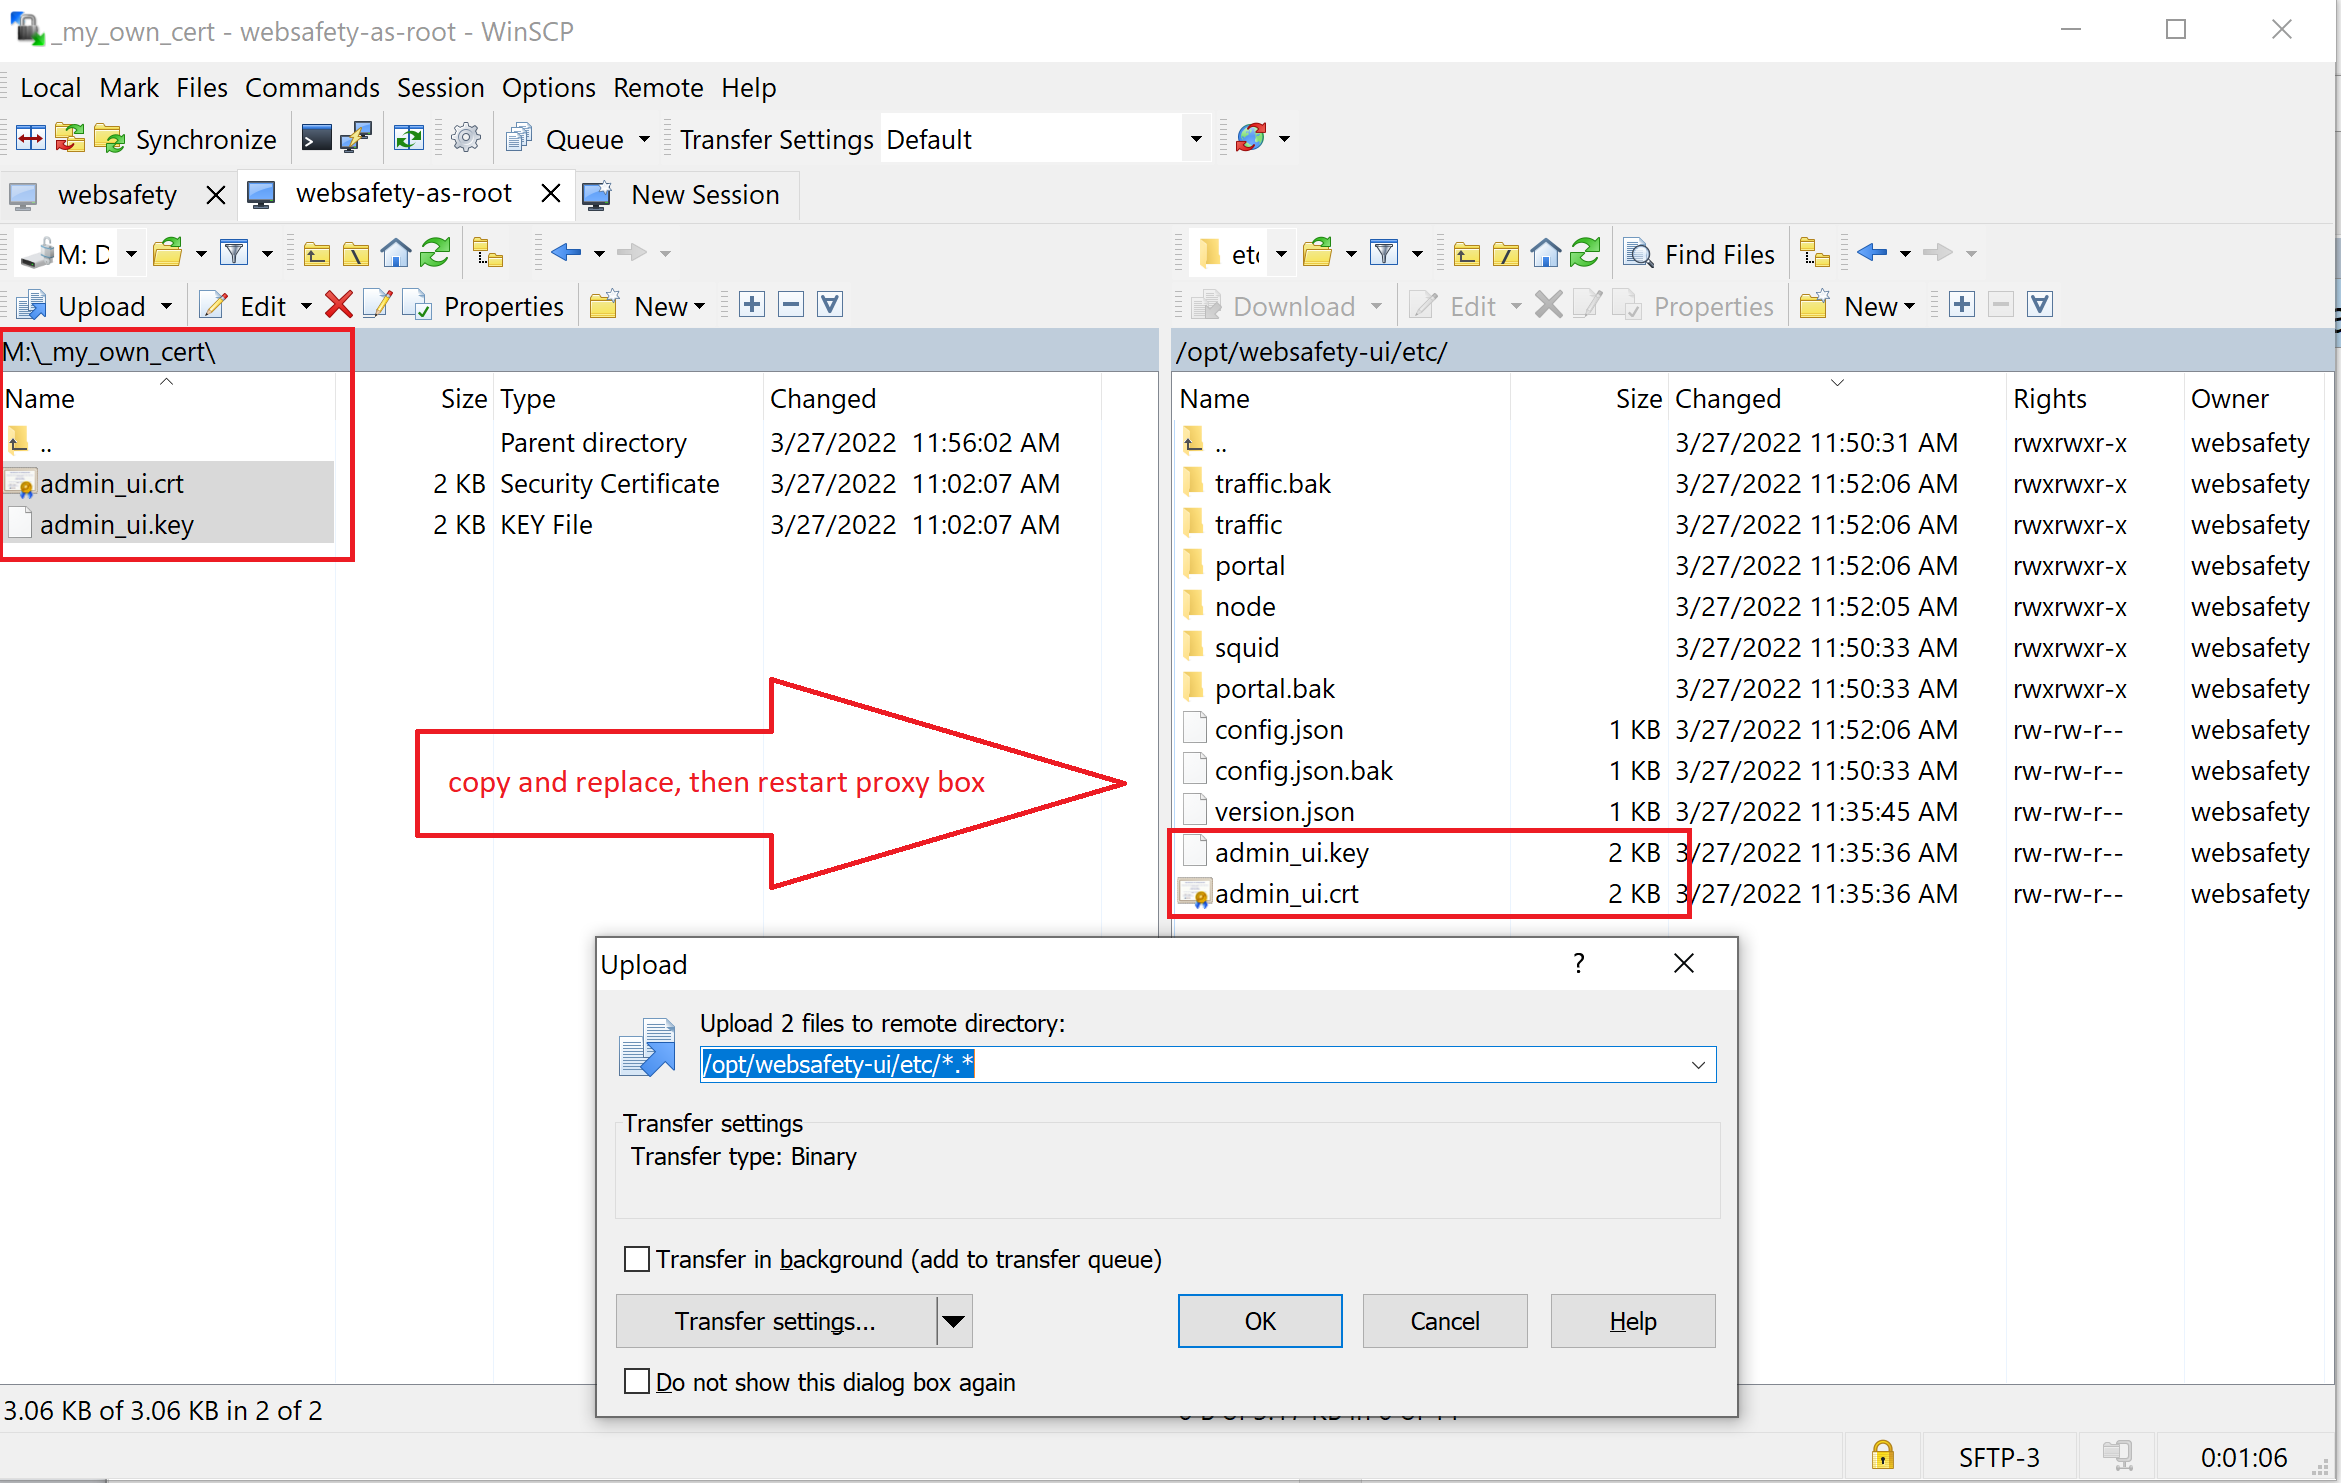
Save the certificate and private key as admin_ui.cer and admin_ui.key respectively (both PEM encoded) and upload them into /opt/websafety-ui/etc/ folder using for example WinSCP as shown on the following screenshot.
Restart the Apache web server on the proxy box with the following command or just reboot the proxy box from Azure portal.
systemctl restart apache2 && reboot
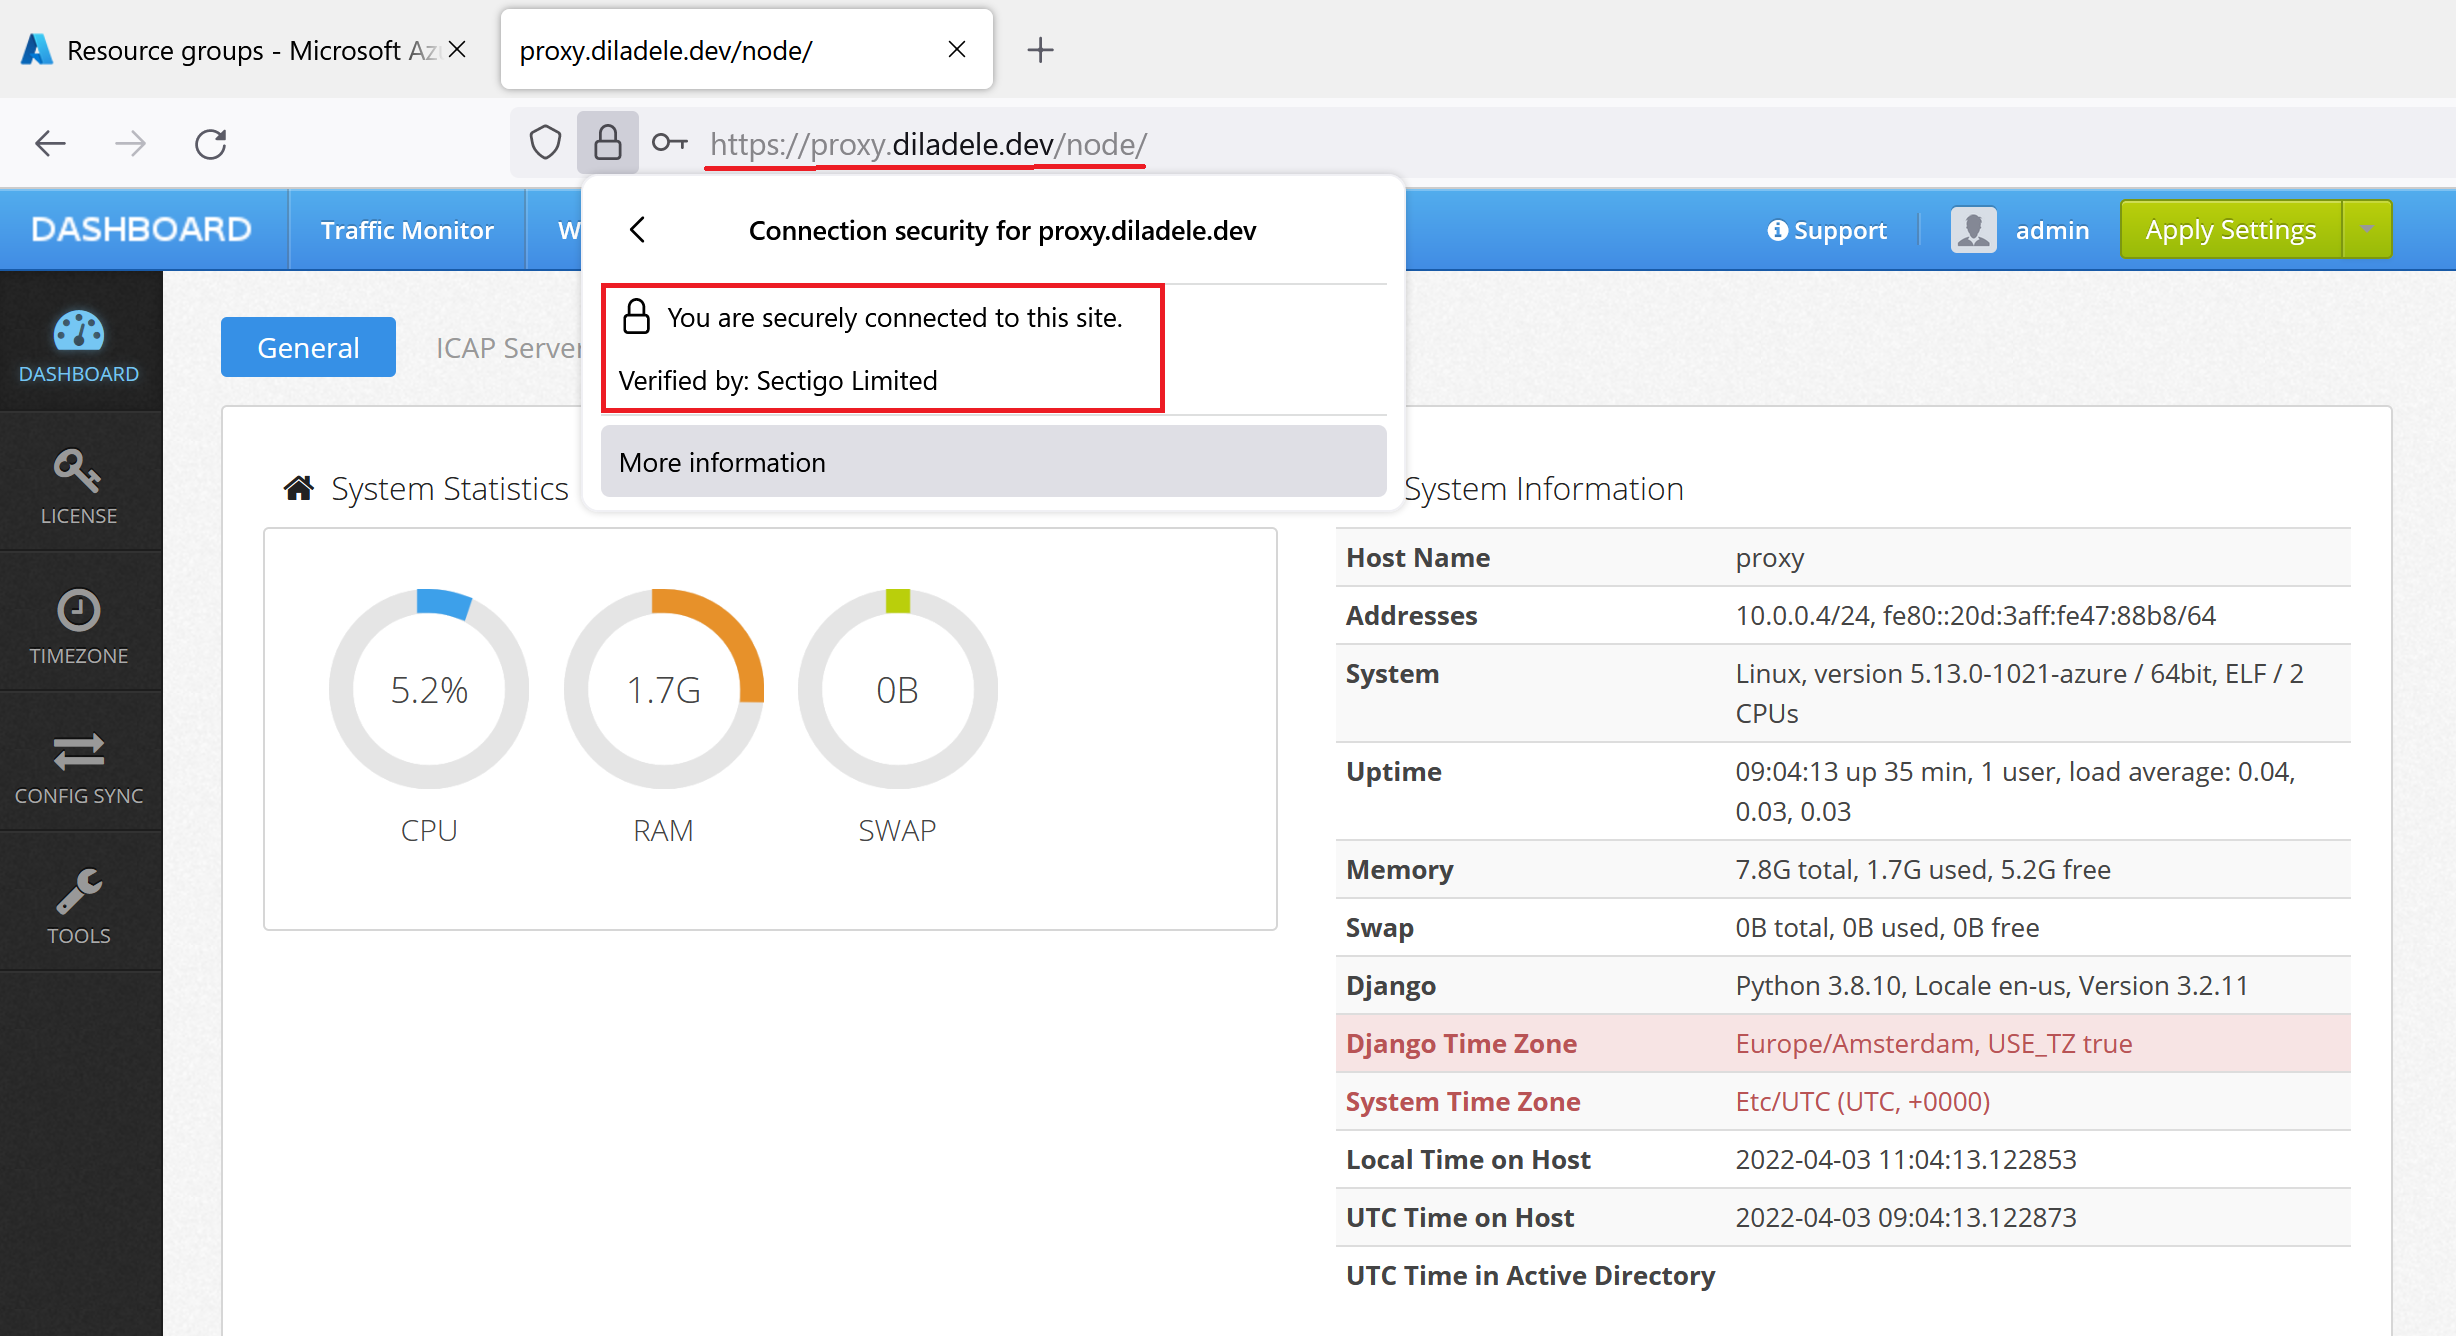
After that try connecting to the proxy box using https://proxy.diladele.dev URL (adjust the URL for your proxy box name of course). The connect should succeed without any warnings of a self-signed certificate present (default installation of Web Safety uses self signed certificate for Admin UI).
Setup HTTPS Inspection (Optional)
Our cloud proxy will need to support HTTPS inspection. If this is not required in your case you can safely skip this step.
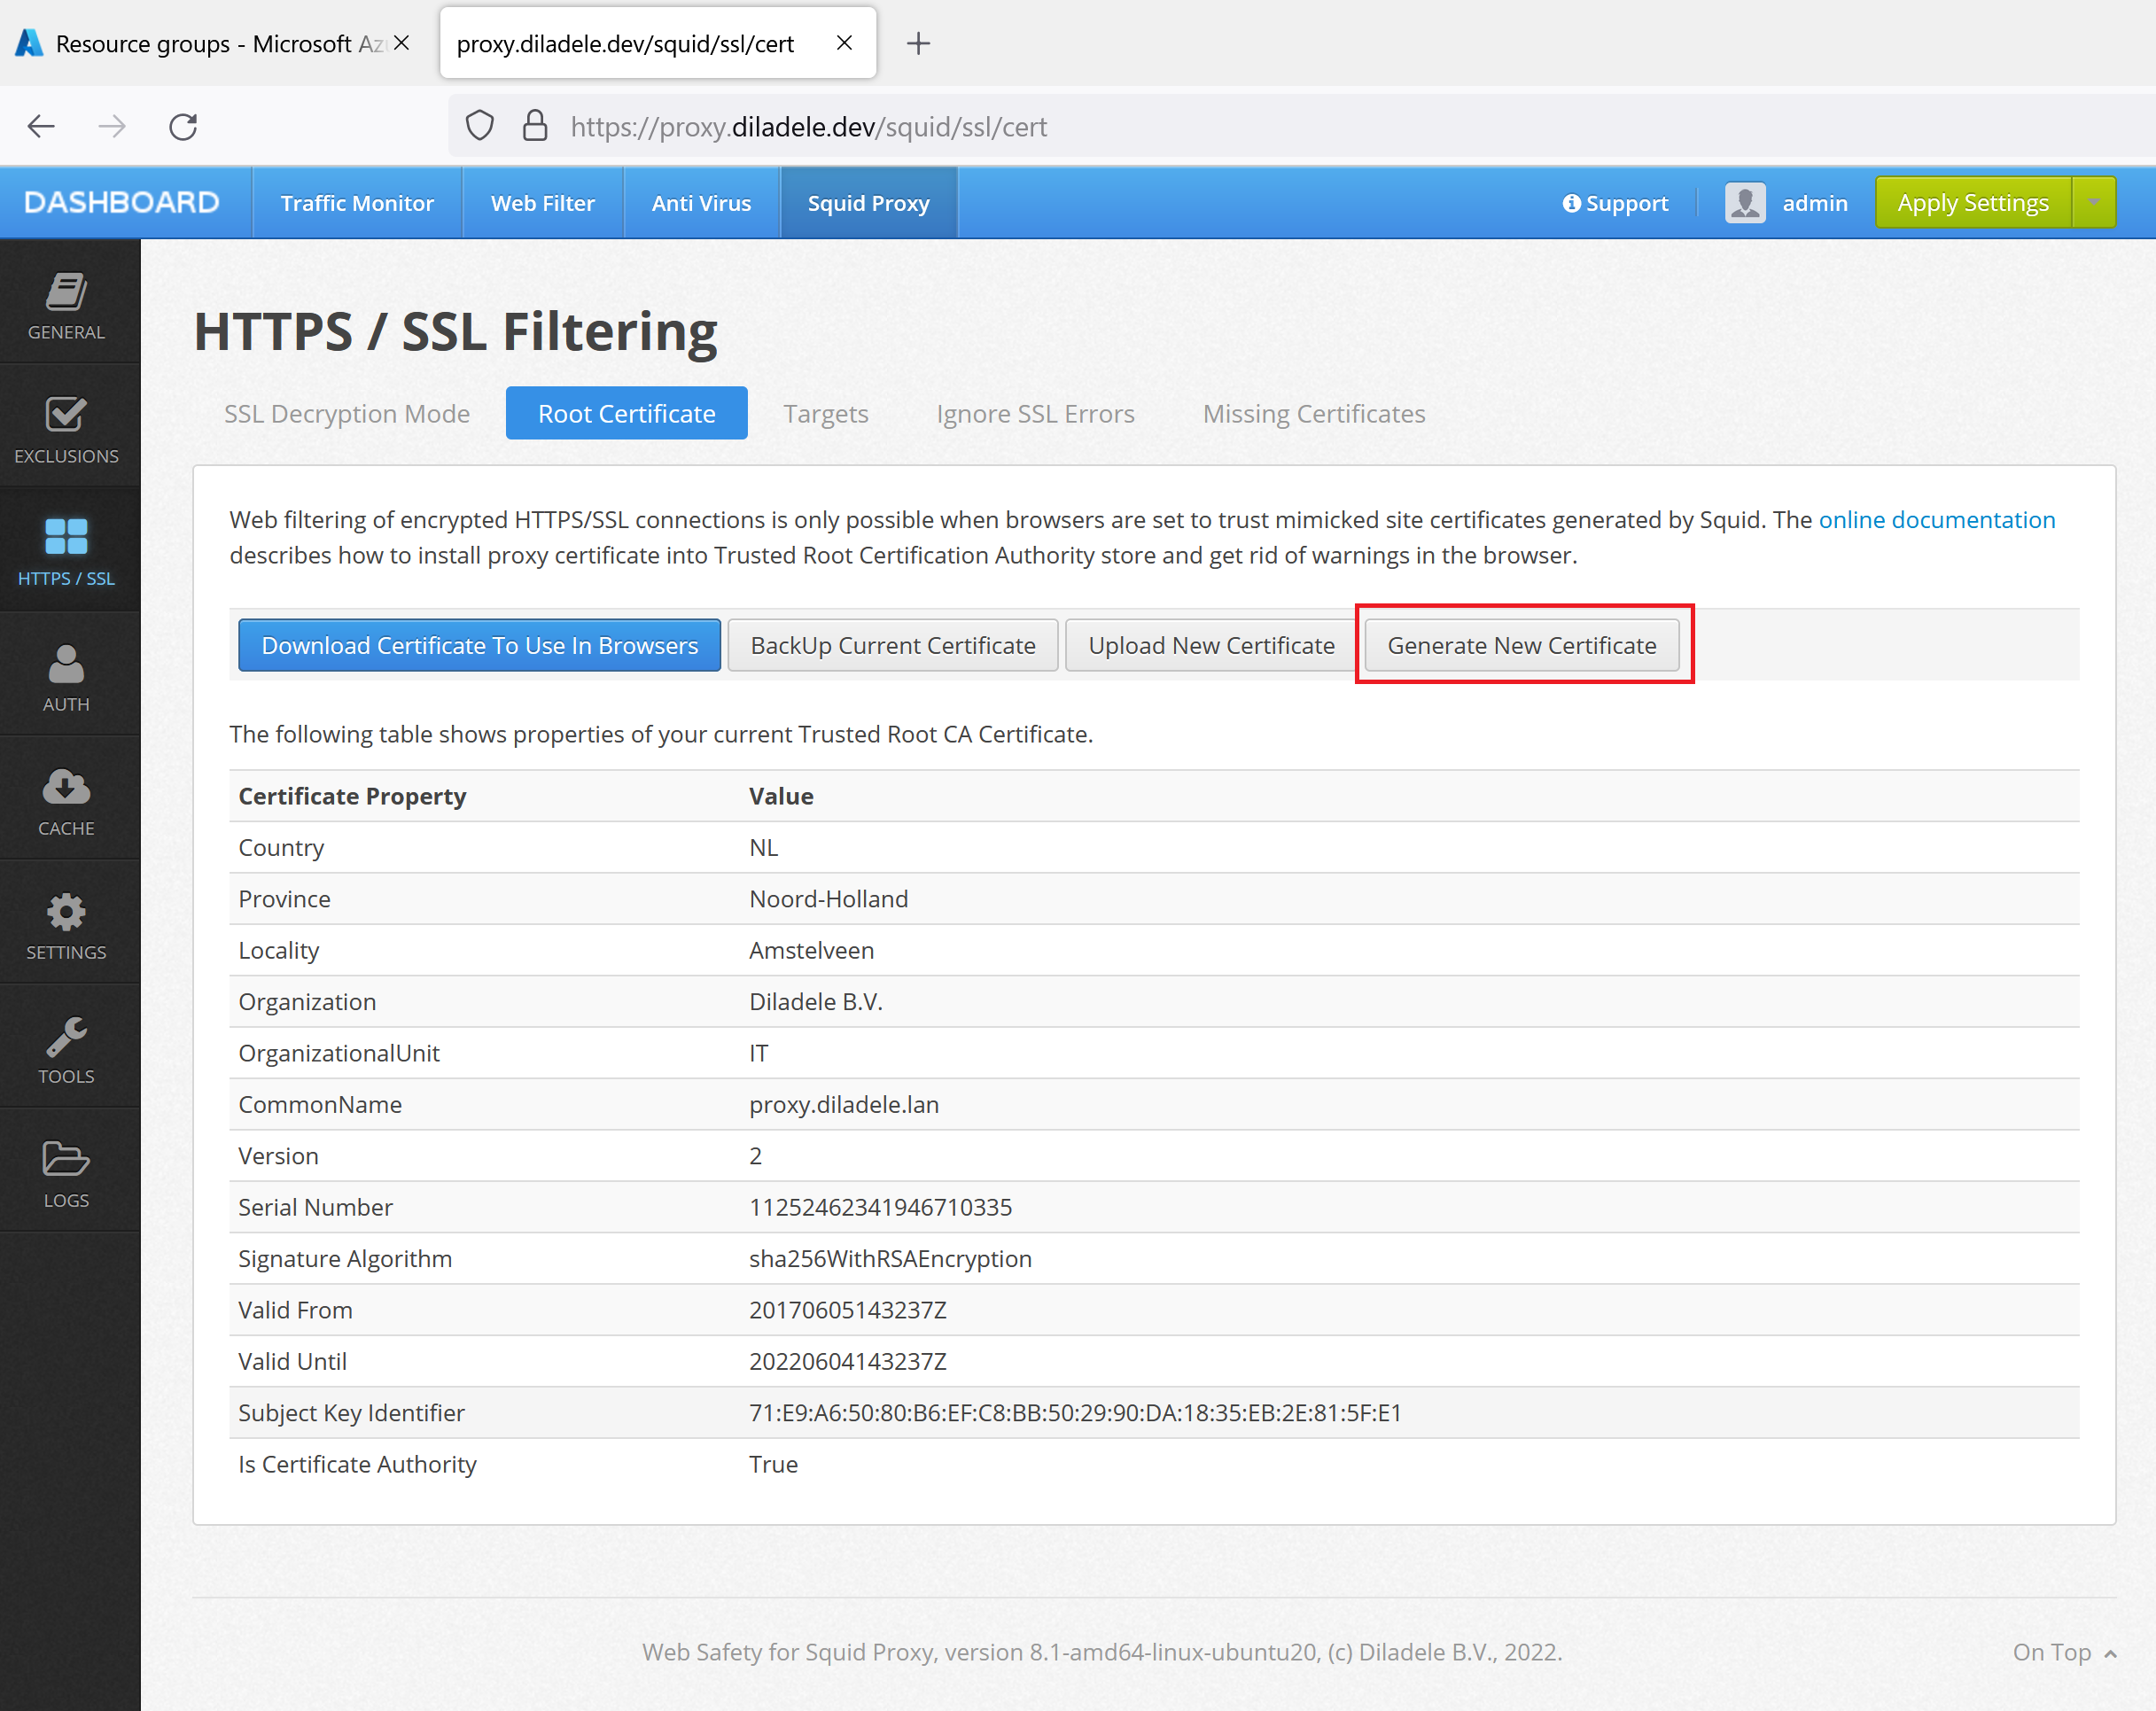
To perform the decryption, we need to generate the Root Decryption Certificate that will be trusted by all our workstations. So, navigate to Squid / HTTPS / Root Certificate and click the Generate Certificate button as shown on the following screenshot. The following article explains this step in greater details - Regenerate Trusted SSL Certificates for Squid.
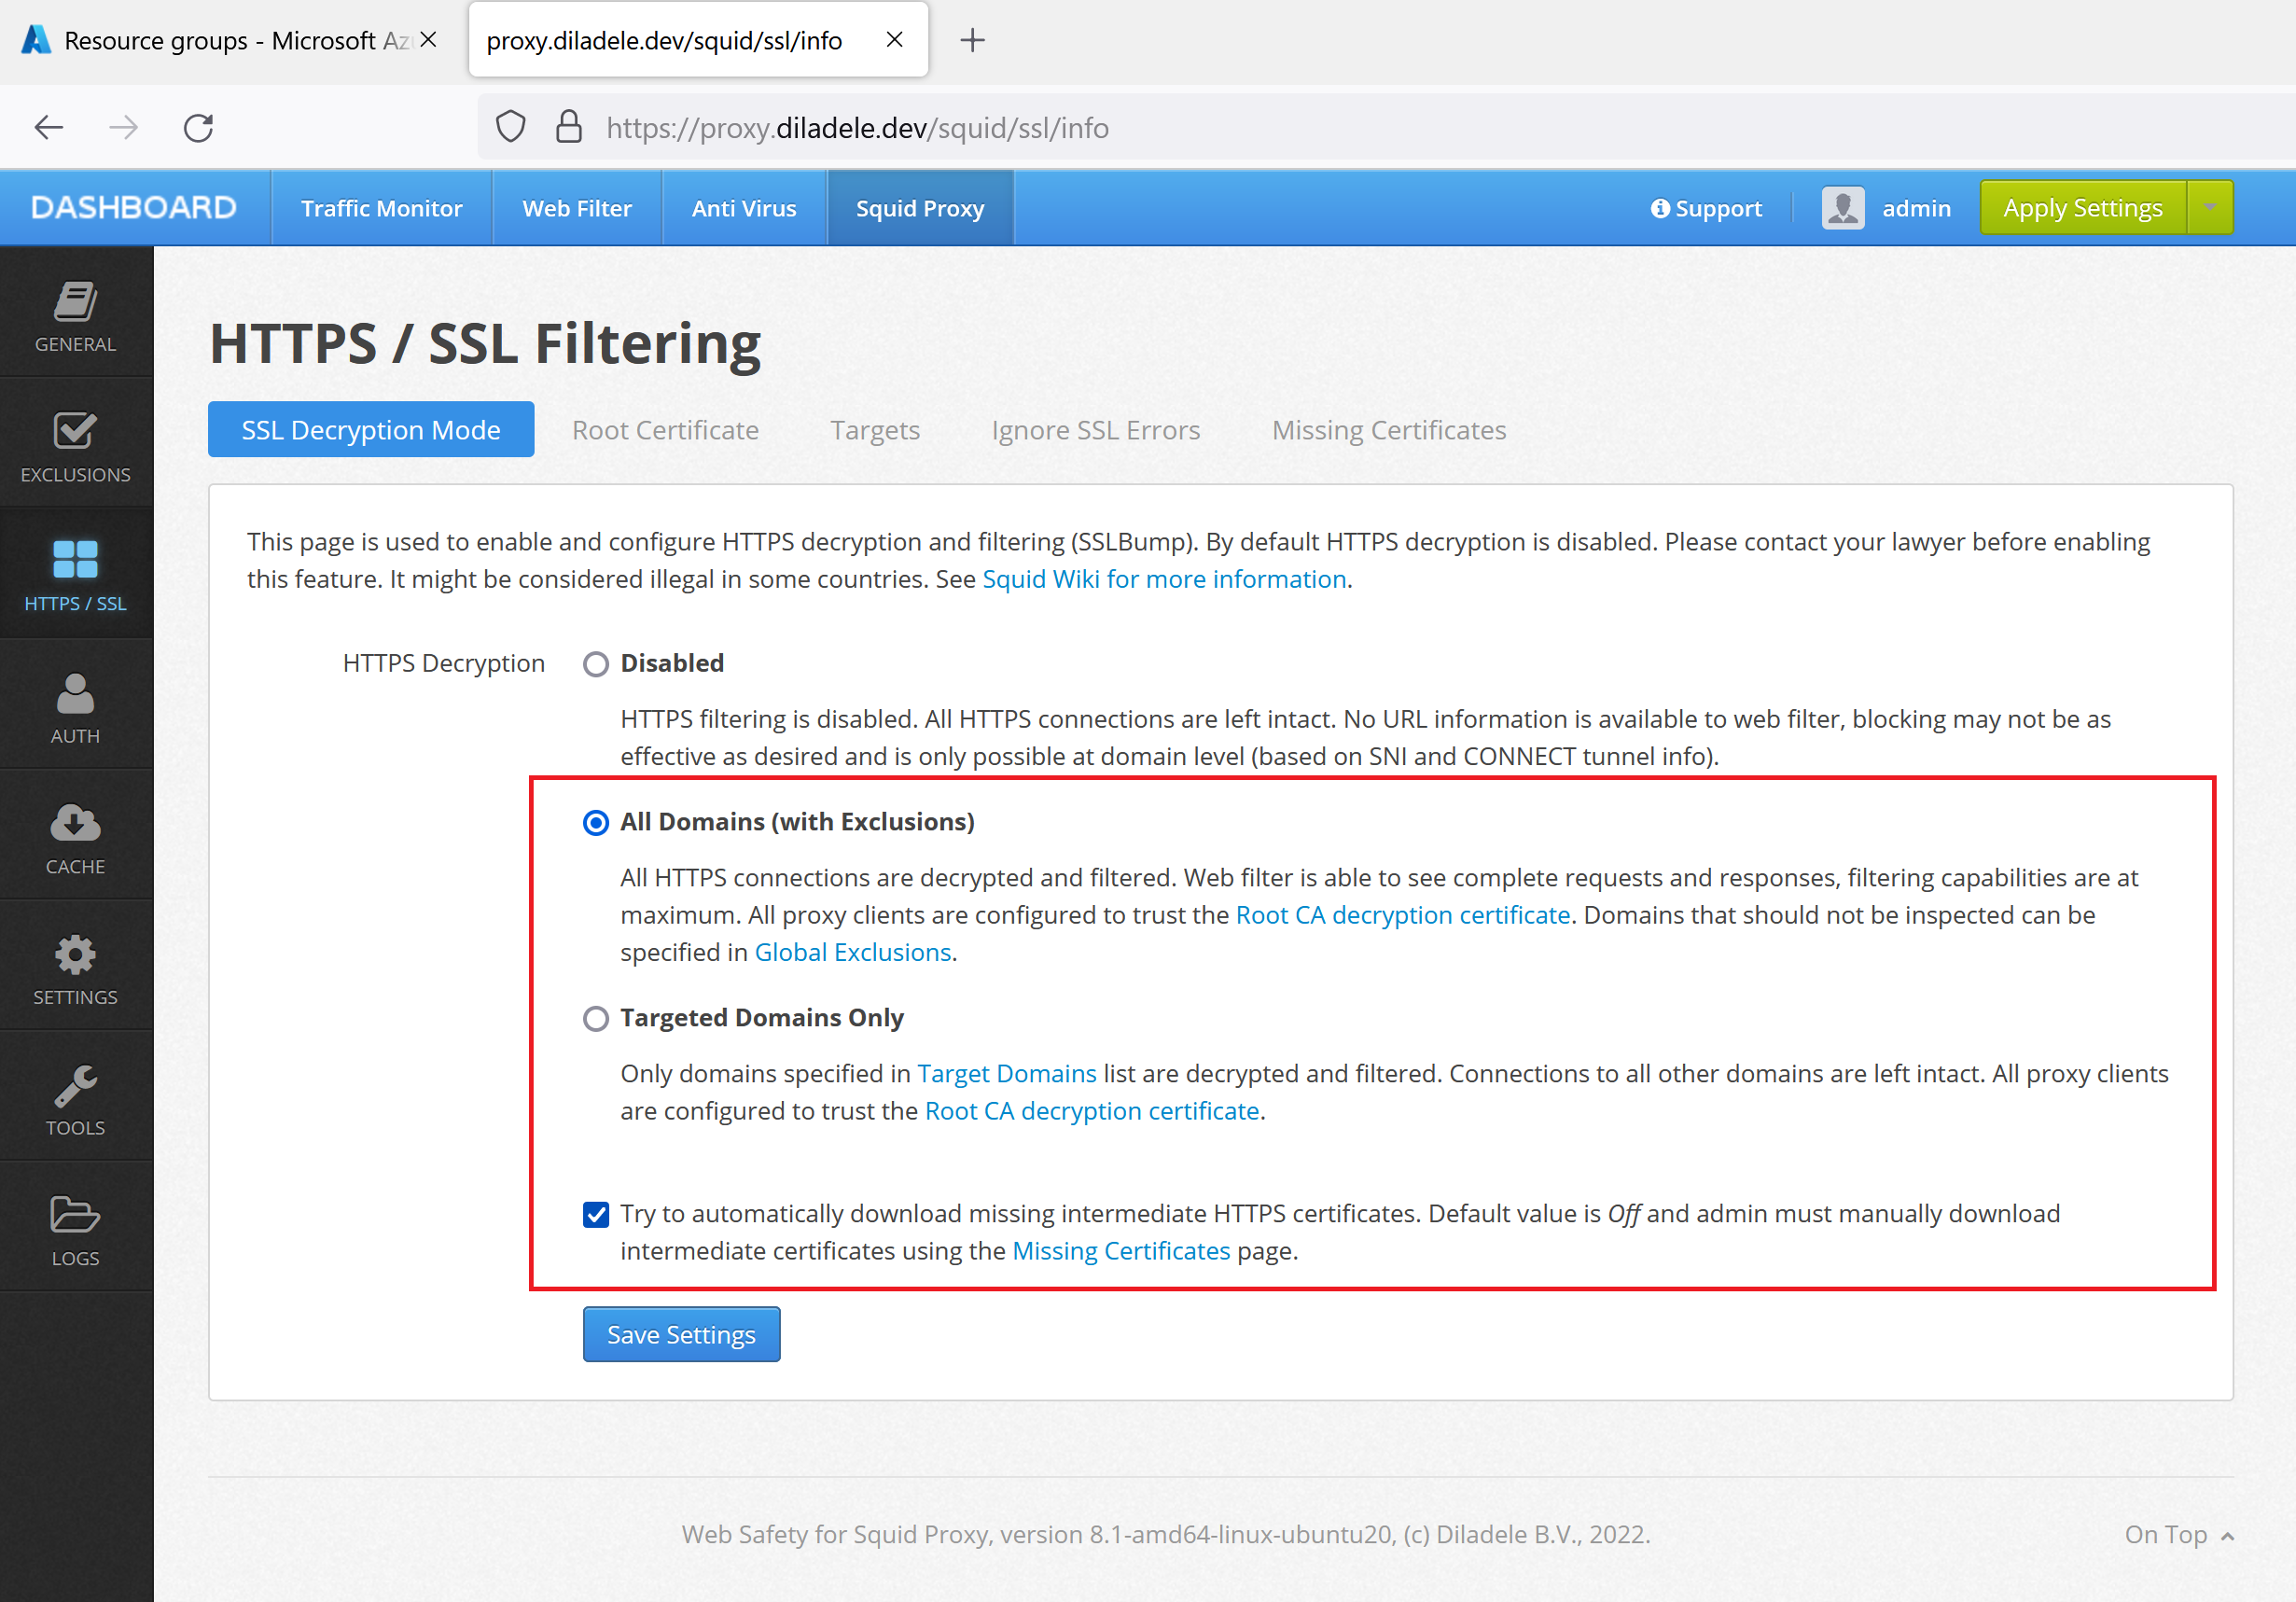
After that, enable HTTPS decryption in Squid / HTTPS / Decryption Mode as shown on the following screenshot.
Configure Client Workstations (Optional)
To use HTTPS decryption, client workstations need to be configured to trust that certificate. To establish this trust, we need to install the decryption certificate into Trusted Root Certificates storage of Local Machine.
This can be done manually as shown in the following article Install Trusted Certificates or by using some third-party workstation management solution like Microsoft Intune.