pfSense Firewall
The first thing to do is to set up the pfSense firewall. We will not dive into describing initial installation steps here, there are already plenty of tutorials on the Internet with great details.
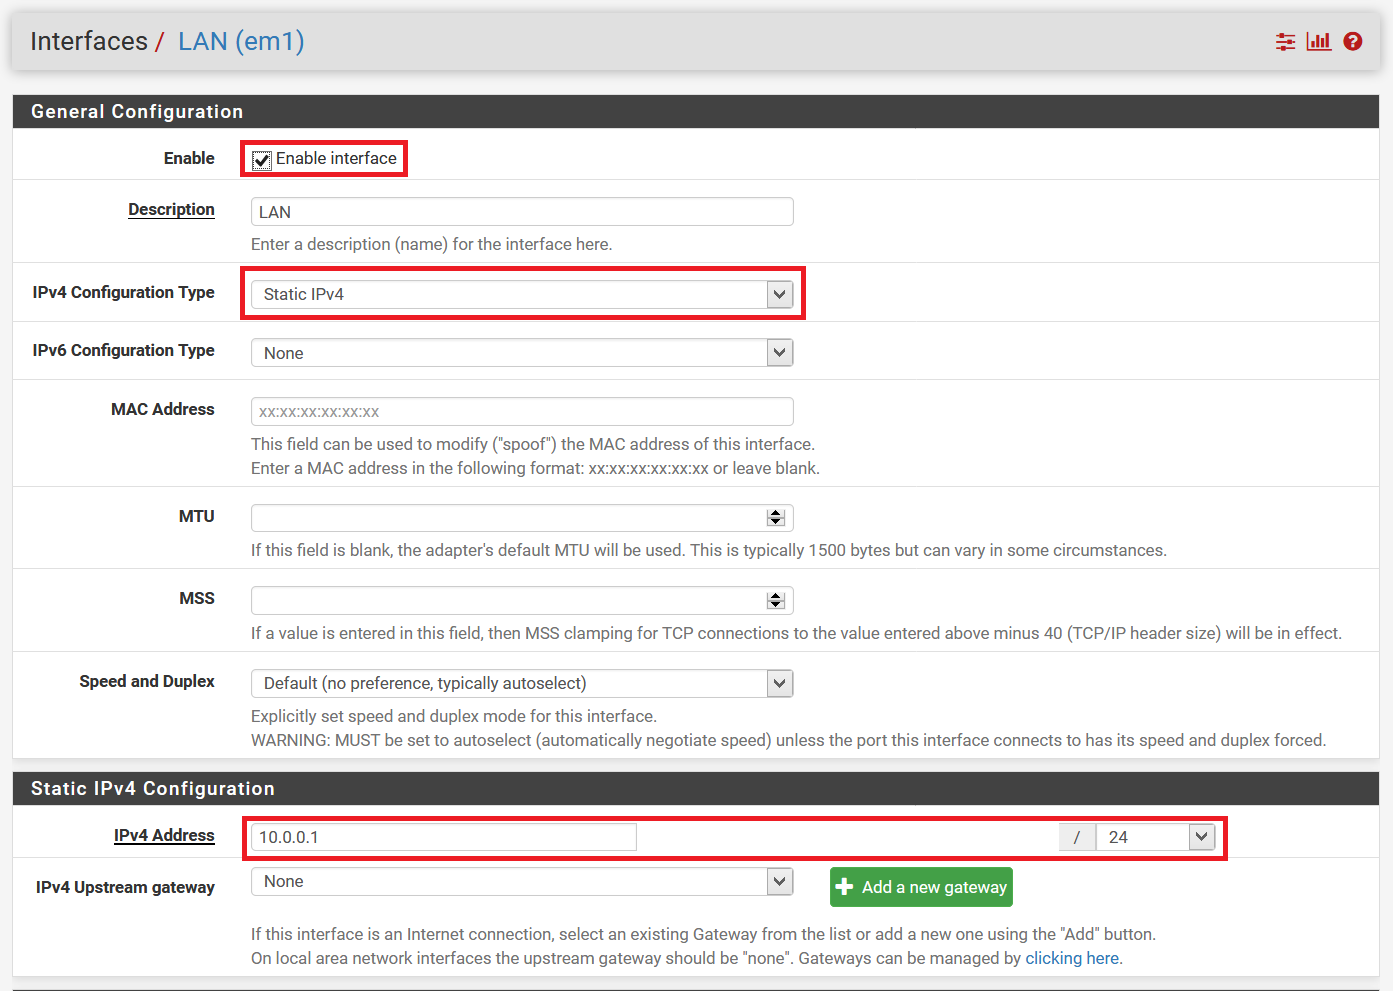
After pfSense is installed, navigate to Interfaces / LAN and set up the static IP address for the LAN interface as indicated on the following screenshot (static IP address of 10.0.0.1 with subnet mask set to 24, interface is enabled). Leave the IP address for the WAN as DHCP - it will be assigned by your ISP network provider.
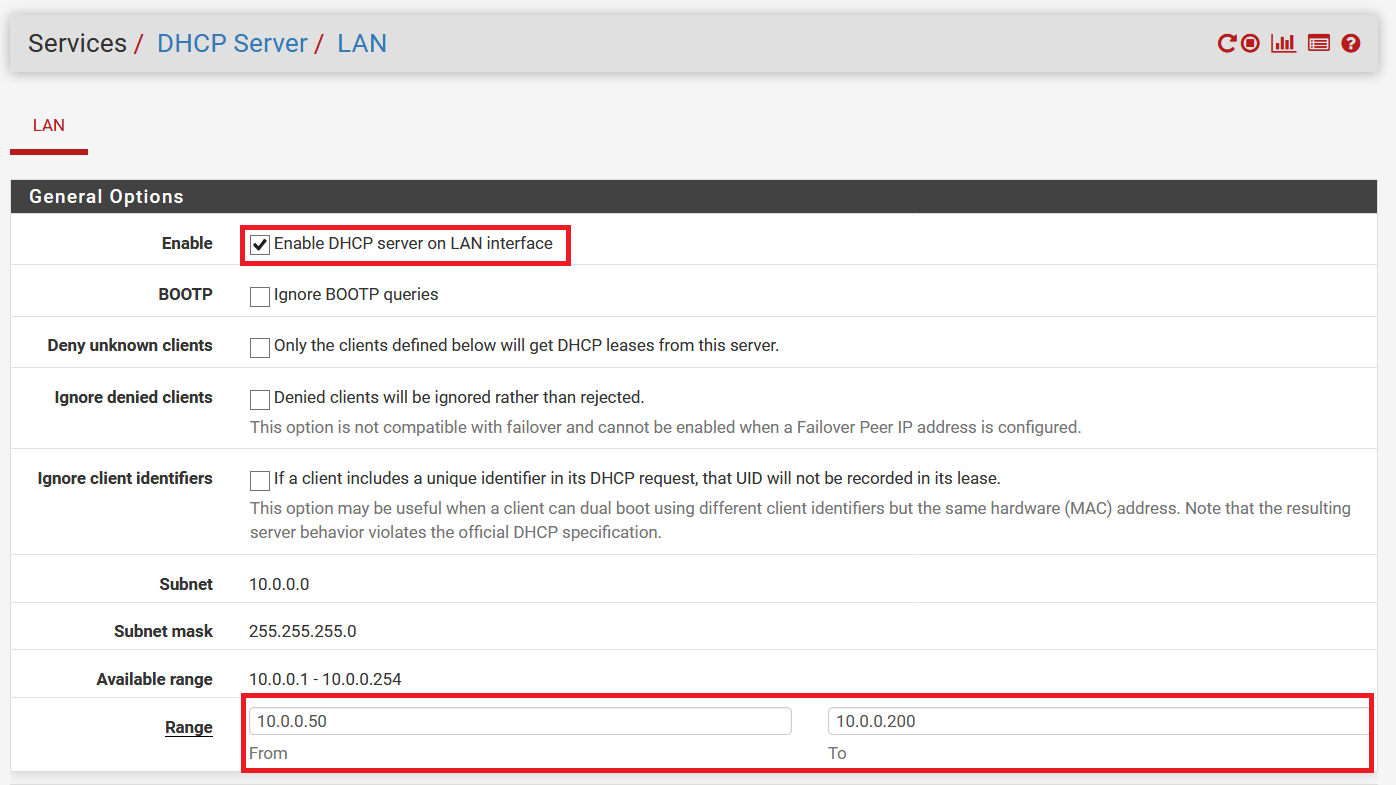
Next, navigate to Services / DHCP Server and enable DHCP configuration for LAN with network range for DHCP addresses to be 10.0.0.50-10.0.0.200 as indicated on the following screenshot.
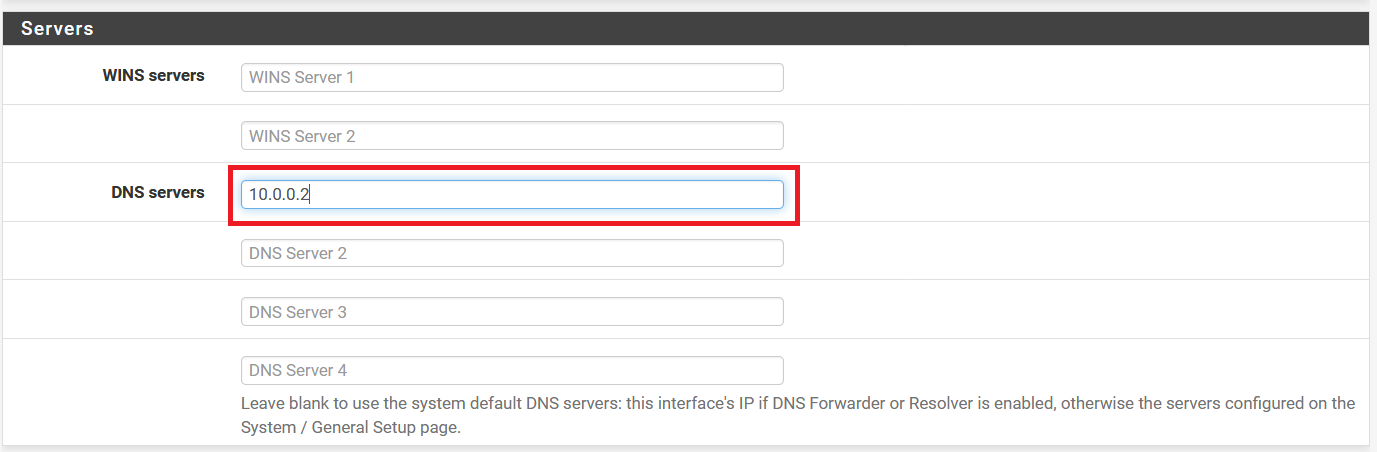
Scroll to Servers section and set DNS server as 10.0.0.2 - this will be our Dns Safety filtering server instance we will setup on the next step.
Scroll all the way down to the bottom of the page and click Save.
Note
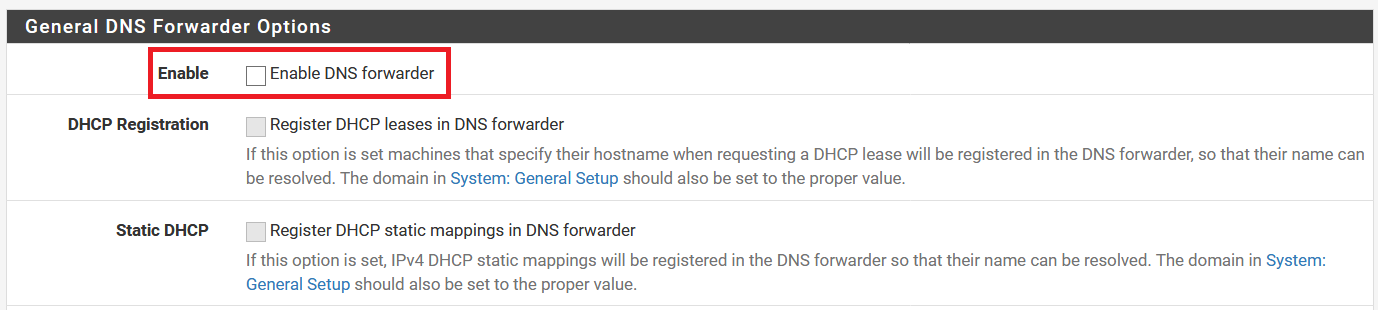
Note how we left the DNS resolver and DNS forwarder on the pfSense as Disabled because all DNS filtering and resolving will be done by Dns Safety.

From now on all our workstations, multimedia devices, smartphones etc will get dynamic IP addresses from DHCP server running on the pfSense firewall. It is now time to install Dns Safety.