Configure GRE Tunnel on Ubuntu 18
Cisco ASA firewall will redirect intercepted HTTP and HTTPS traffic to proxy box using GRE tunnel. Each IP packet that comes from a workstation with destination the Internet will be wrapped into a GRE packet and diverted to the proxy box. Squid process on the proxy box will then intercept these packages, contact servers on the Internet, scan requests and responses using Web Safety and return scanned pages to the workstations.
Create GRE tunnel
Important
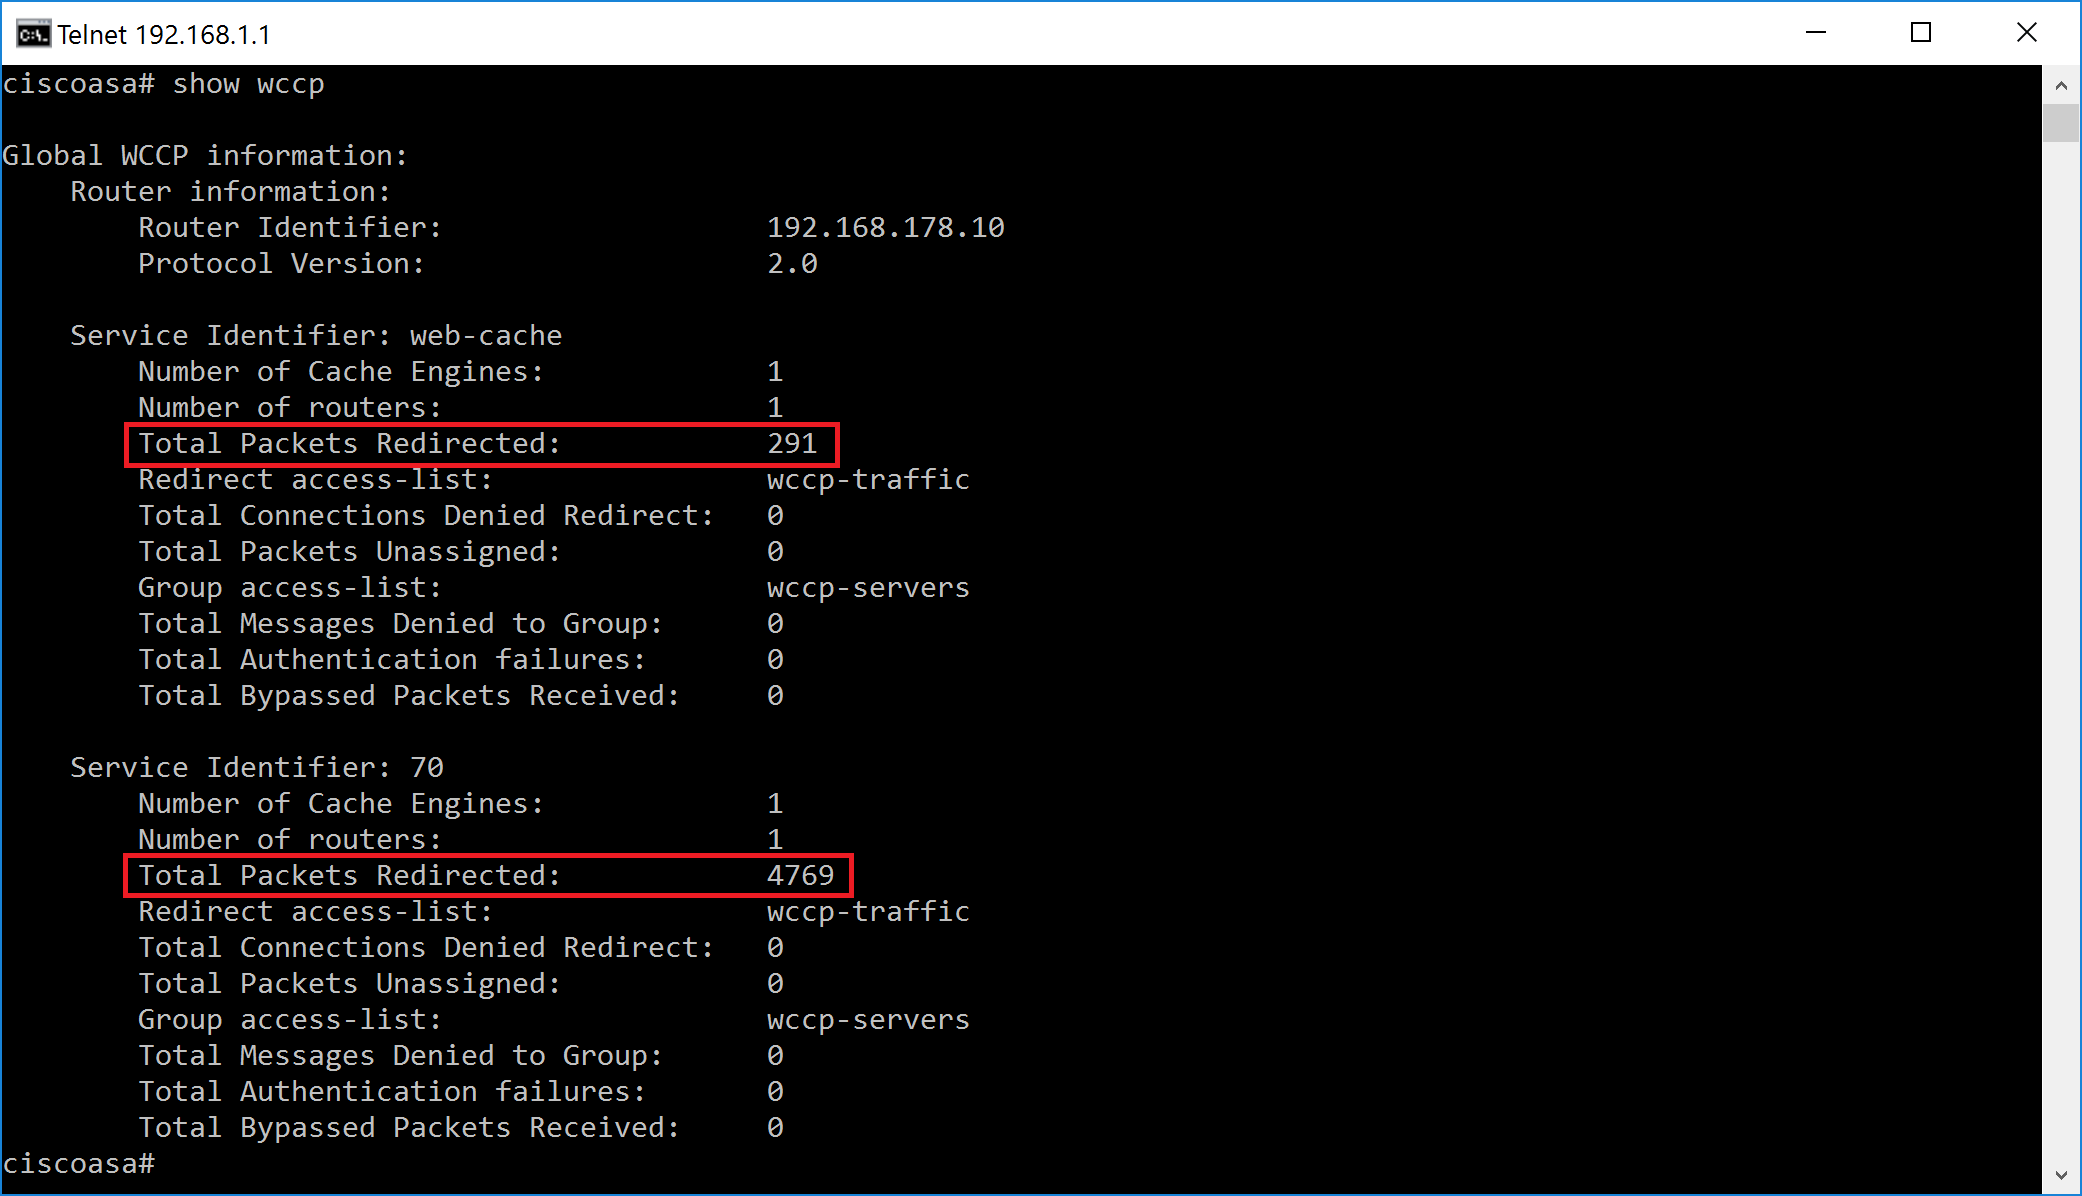
GRE diverted packets will be originating from Router ID IP address which may or may not be equal to 192.168.6.1 IP address of the Cisco ASA on the internal network. In order to find out the Router ID type show wccp and look for Router Identifier address as indicated on the previous step.
To create the GRE tunnel on proxy box with IP address of 192.168.6.15, we would need to manually adjust some network settings. First, create a wccp0_up.sh script in /etc/networkd-dispatcher/routable.d folder with the following contents. The script will create GRE network tunnel automatically when ens160 network interface is activated.
Make the script executable by running chmod +x wccp0_up.sh and reset the owner of script to root by running chown root:root wccp0_up.sh. This is important otherwise the script will not be processed by the networkd-dispatcher module.
#!/bin/bash

if [ "$IFACE" == "ens160" ]; then
    ip tunnel add wccp0 mode gre remote 192.168.178.10 local 192.168.6.15 dev ens160 ttl 255
    ip link set wccp0 up
fi
Warning
Please note how we use the Router ID 192.168.178.10 here in the GRE tunnel definition. Your Router ID will be different of course!
Next, create a wccp0_down.sh script in /etc/networkd-dispatcher/off.d folder with the following contents. The script will delete existing GRE network tunnel when ens160 network interface is deactivated.
Again make the script executable by running chmod +x wccp0_down.sh and reset the owner of script to root by running chown root:root wccp0_down.sh.
#!/bin/bash

if [ "$IFACE" == "ens160" ]; then
    ip link set wccp0 down
    ip tunnel del wccp0
fi
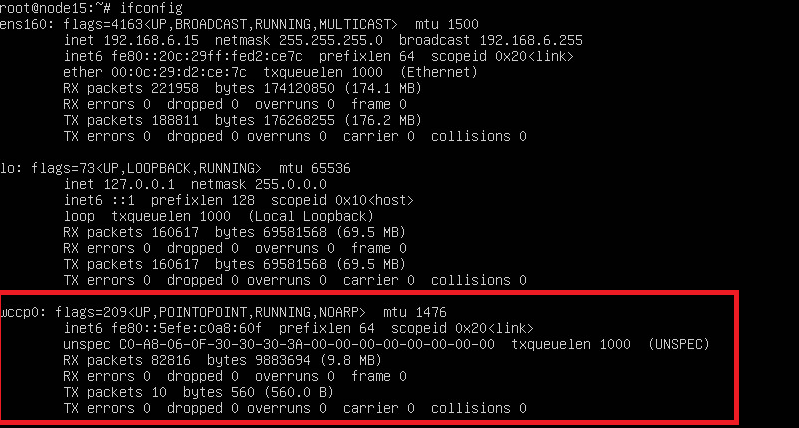
Reboot your proxy box now and after it comes back to life run ifconfig to check if GRE tunnel was indeed automatically configured. The output should look something like this:
Enable IP packet forwarding and disable RP filter in Linux
The GRE tunnel transports packets sourced from workstations with destination the Internet. By default Linux kernel will throw such packets away because none of the locally configured NICs have IP addresses of the Internet. This functionality is called IP Spoofing Protection and it is on by default. We must turn it off in order to continue.
Open /etc/sysctl.conf, find the settings for rp_filter and make them look like the following:
# Uncomment the next two lines to enable Spoof protection (reverse-path filter)
# Turn on Source Address Verification in all interfaces to
# prevent some spoofing attacks
net.ipv4.conf.default.rp_filter=0
net.ipv4.conf.all.rp_filter=0
Also find the net.ipv4.ip_forward setting and make it look like the following (i.e. uncommented).
# Uncomment the next line to enable packet forwarding for IPv4
net.ipv4.ip_forward=1
Reboot the proxy now and after it comes back to life check the status of IP forwarding and RP filter settings by running the following commands. The 1 should only be shown for ip_forward, all other settings should be set to 0.
root@websafety:~# cat /proc/sys/net/ipv4/ip_forward
1
root@websafety:~# cat /proc/sys/net/ipv4/conf/default/rp_filter
0
root@websafety:~# cat /proc/sys/net/ipv4/conf/all/rp_filter
0
root@websafety:~# cat /proc/sys/net/ipv4/conf/ens160/rp_filter
0
root@websafety:~# cat /proc/sys/net/ipv4/conf/lo/rp_filter
0
root@websafety:~# cat /proc/sys/net/ipv4/conf/wccp0/rp_filter
0
Redirect incoming packets from GRE tunnel to Squid
One final step is to redirect the packes for ports 80 (HTTP) and 443 (HTTPS) to local Squid instance, configured as indicated on the step Configure WCCP protocol in Squid. Please note HTTP traffic is redirected to http_port 3126 and HTTPS traffic is redirected to https_port 3127.
iptables -t nat -A PREROUTING -i wccp0 -p tcp -m tcp --dport 80 -j DNAT --to-destination 192.168.6.15:3126
iptables -t nat -A PREROUTING -i wccp0 -p tcp -m tcp --dport 443 -j DNAT --to-destination 192.168.6.15:3127
To save configured iptables between reboots run the following command (you might need to install the iptables-persistent package by running apt-get install iptables-persistent).
netfilter-persistent save
Reboot your proxy box again and check the output of iptables -t nat -S command. It should look like:

Check WCCP works
All configuration on the proxy side is now finished. Let’s wait until Squid is registered in Cisco ASA (approx 30 seconds by default) and try browsing HTTP and HTTPS sited from any workstation. The following screenshots indicate successful registration and packet redirection on the Cisco ASA.
The following screenshots indicate that both HTTP and HTTPS are filtered.

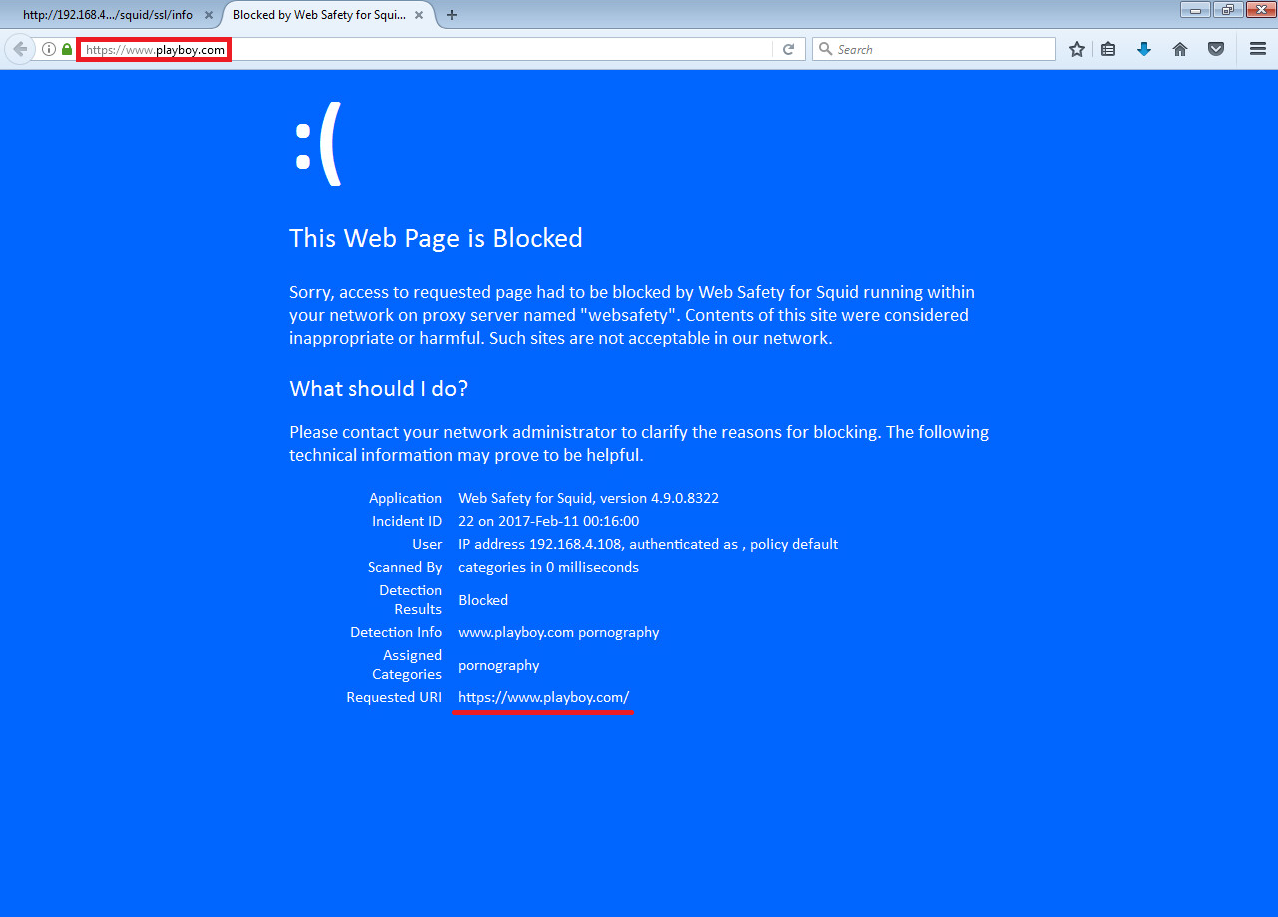
Note
Here we have HTTPS filtering enabled in Web Safety as indicated in admin guide article Enable HTTPS Filtering in Admin UI and Root Certificate of Squid was installed too as described in article Install Trusted Certificates.