Network Description
This tutorial assumes your Mikrotik based network is up and running. The following screenshot shows simple network diagram.
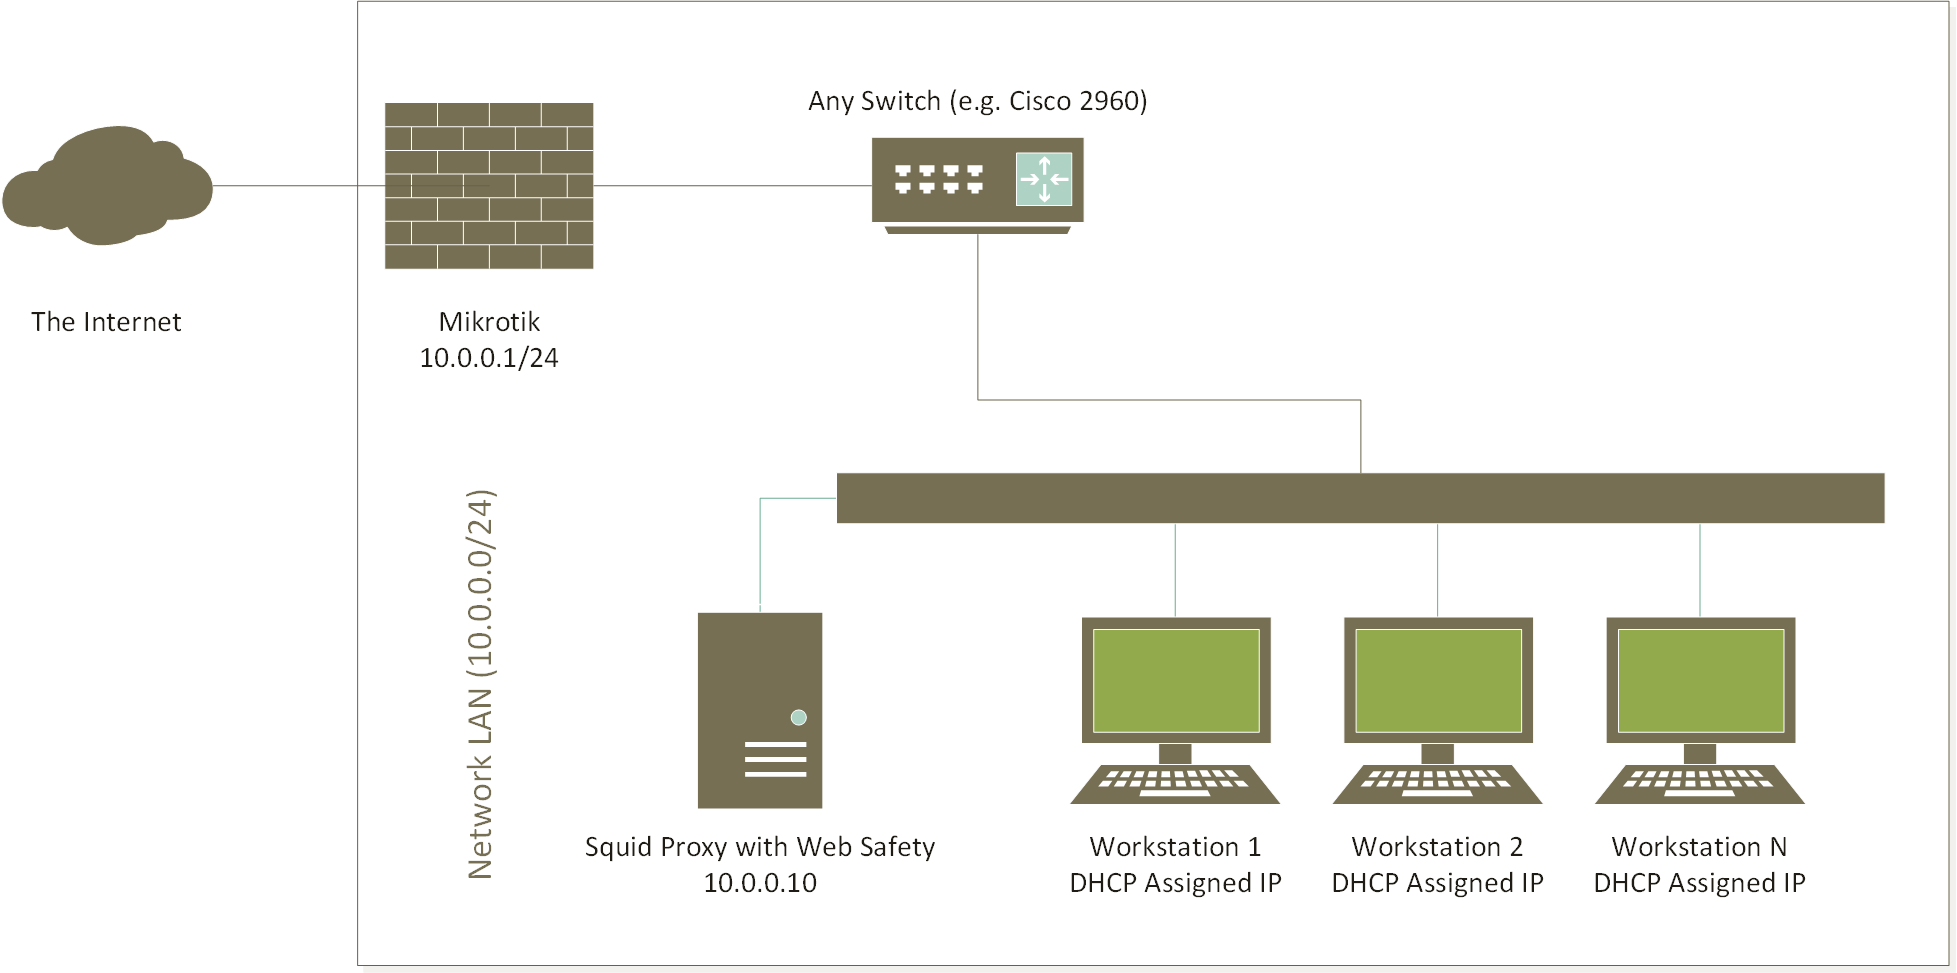
Specifically the following settings are in effect.
Mikrotik Router
We will be using Mikrotic CHR version 7.11 for this tutorial.
Setting |
Value |
|---|---|
WAN interface |
either1, IP settings assigned by ISP provider |
LAN interface |
either2 |
LAN IP Address |
10.0.0.1/24 |
DHCP Server for LAN |
Active, distributes client addresses in range 10.0.0.100 to 10.0.0.200, client DNS server is pointing at 10.0.0.1 |
DNS Server for LAN |
Active, forwards DNS requests to upstream forwarders, able to resolve Internet addresses |
NAT (Masquerade) |
Active, clients are able to normally browse the Internet |
For your reference, here is the export of the initial Mikrotik configuration for this tutorial lab. The configuration is minimal enough to illustrate the transparent interception, all other settings were left out to ease understanding. Carefully adjust it as required for your own case before deploying into production.
#
# reset the router configuration by running "/system reset-configuration"
#

# name the device being configured
/system identity set name="Router"

# assign the IP address for the ISP side
/ip address add address=192.168.5.10/24 interface=ether1 network=192.168.5.0

# assign the IP address for the LAN side
/ip address add address=10.0.0.1/24 interface=ether2 network=10.0.0.0

# create the DHCP pool and enable DHCP server on the LAN side
/ip pool add name=pool ranges=10.0.0.100-10.0.0.200
/ip dhcp-server network add address=10.0.0.0/24 dns-server=10.0.0.1 gateway=10.0.0.1
/ip dhcp-server add address-pool=pool interface=ether2 name=dhcp

# enable NAT
/ip firewall nat add action=masquerade chain=srcnat out-interface=ether1 src-address=10.0.0.0/24

# and allow DNS connections from LAN
/ip dns set allow-remote-requests=yes servers=8.8.8.8
Client Workstation in the LAN
Any client workstation in the LAN is configured by DHCP server running on Mikrotik router and typical settings look like the following.
Setting |
Value |
|---|---|
IP Address |
10.0.0.100 (or any other in DHCP range) |
Default Gateway |
10.0.0.1 |
Network Mask |
255.255.255.0 |
DNS Server |
Set by the DHCP server of Mikrotik |
From now on we will assume the client workstations are able to browser the Internet normally without any errors. We will now proceed to setting up the HTTP and HTTPS protocol filtering for all workstations in the network. This will be done transparently, i.e. no manual configuration of browsers will be required.
In order to achieve these goals we will do the following.
Deploy a separate proxy server in the network, running Squid for transparent interception and Web Safety for web filtering of HTTP and HTTPS traffic.
Redirect HTTP and HTTPS traffic from Mikrotik router to proxy box using Policy Based Routing.