Step 4. Link to Active Directory domain
In order to be able to integrate with existing Active Directory to provide single-sign-on authentication and web filtering based on Active Directory security groups Web Safety needs to be linked to your existing domain.
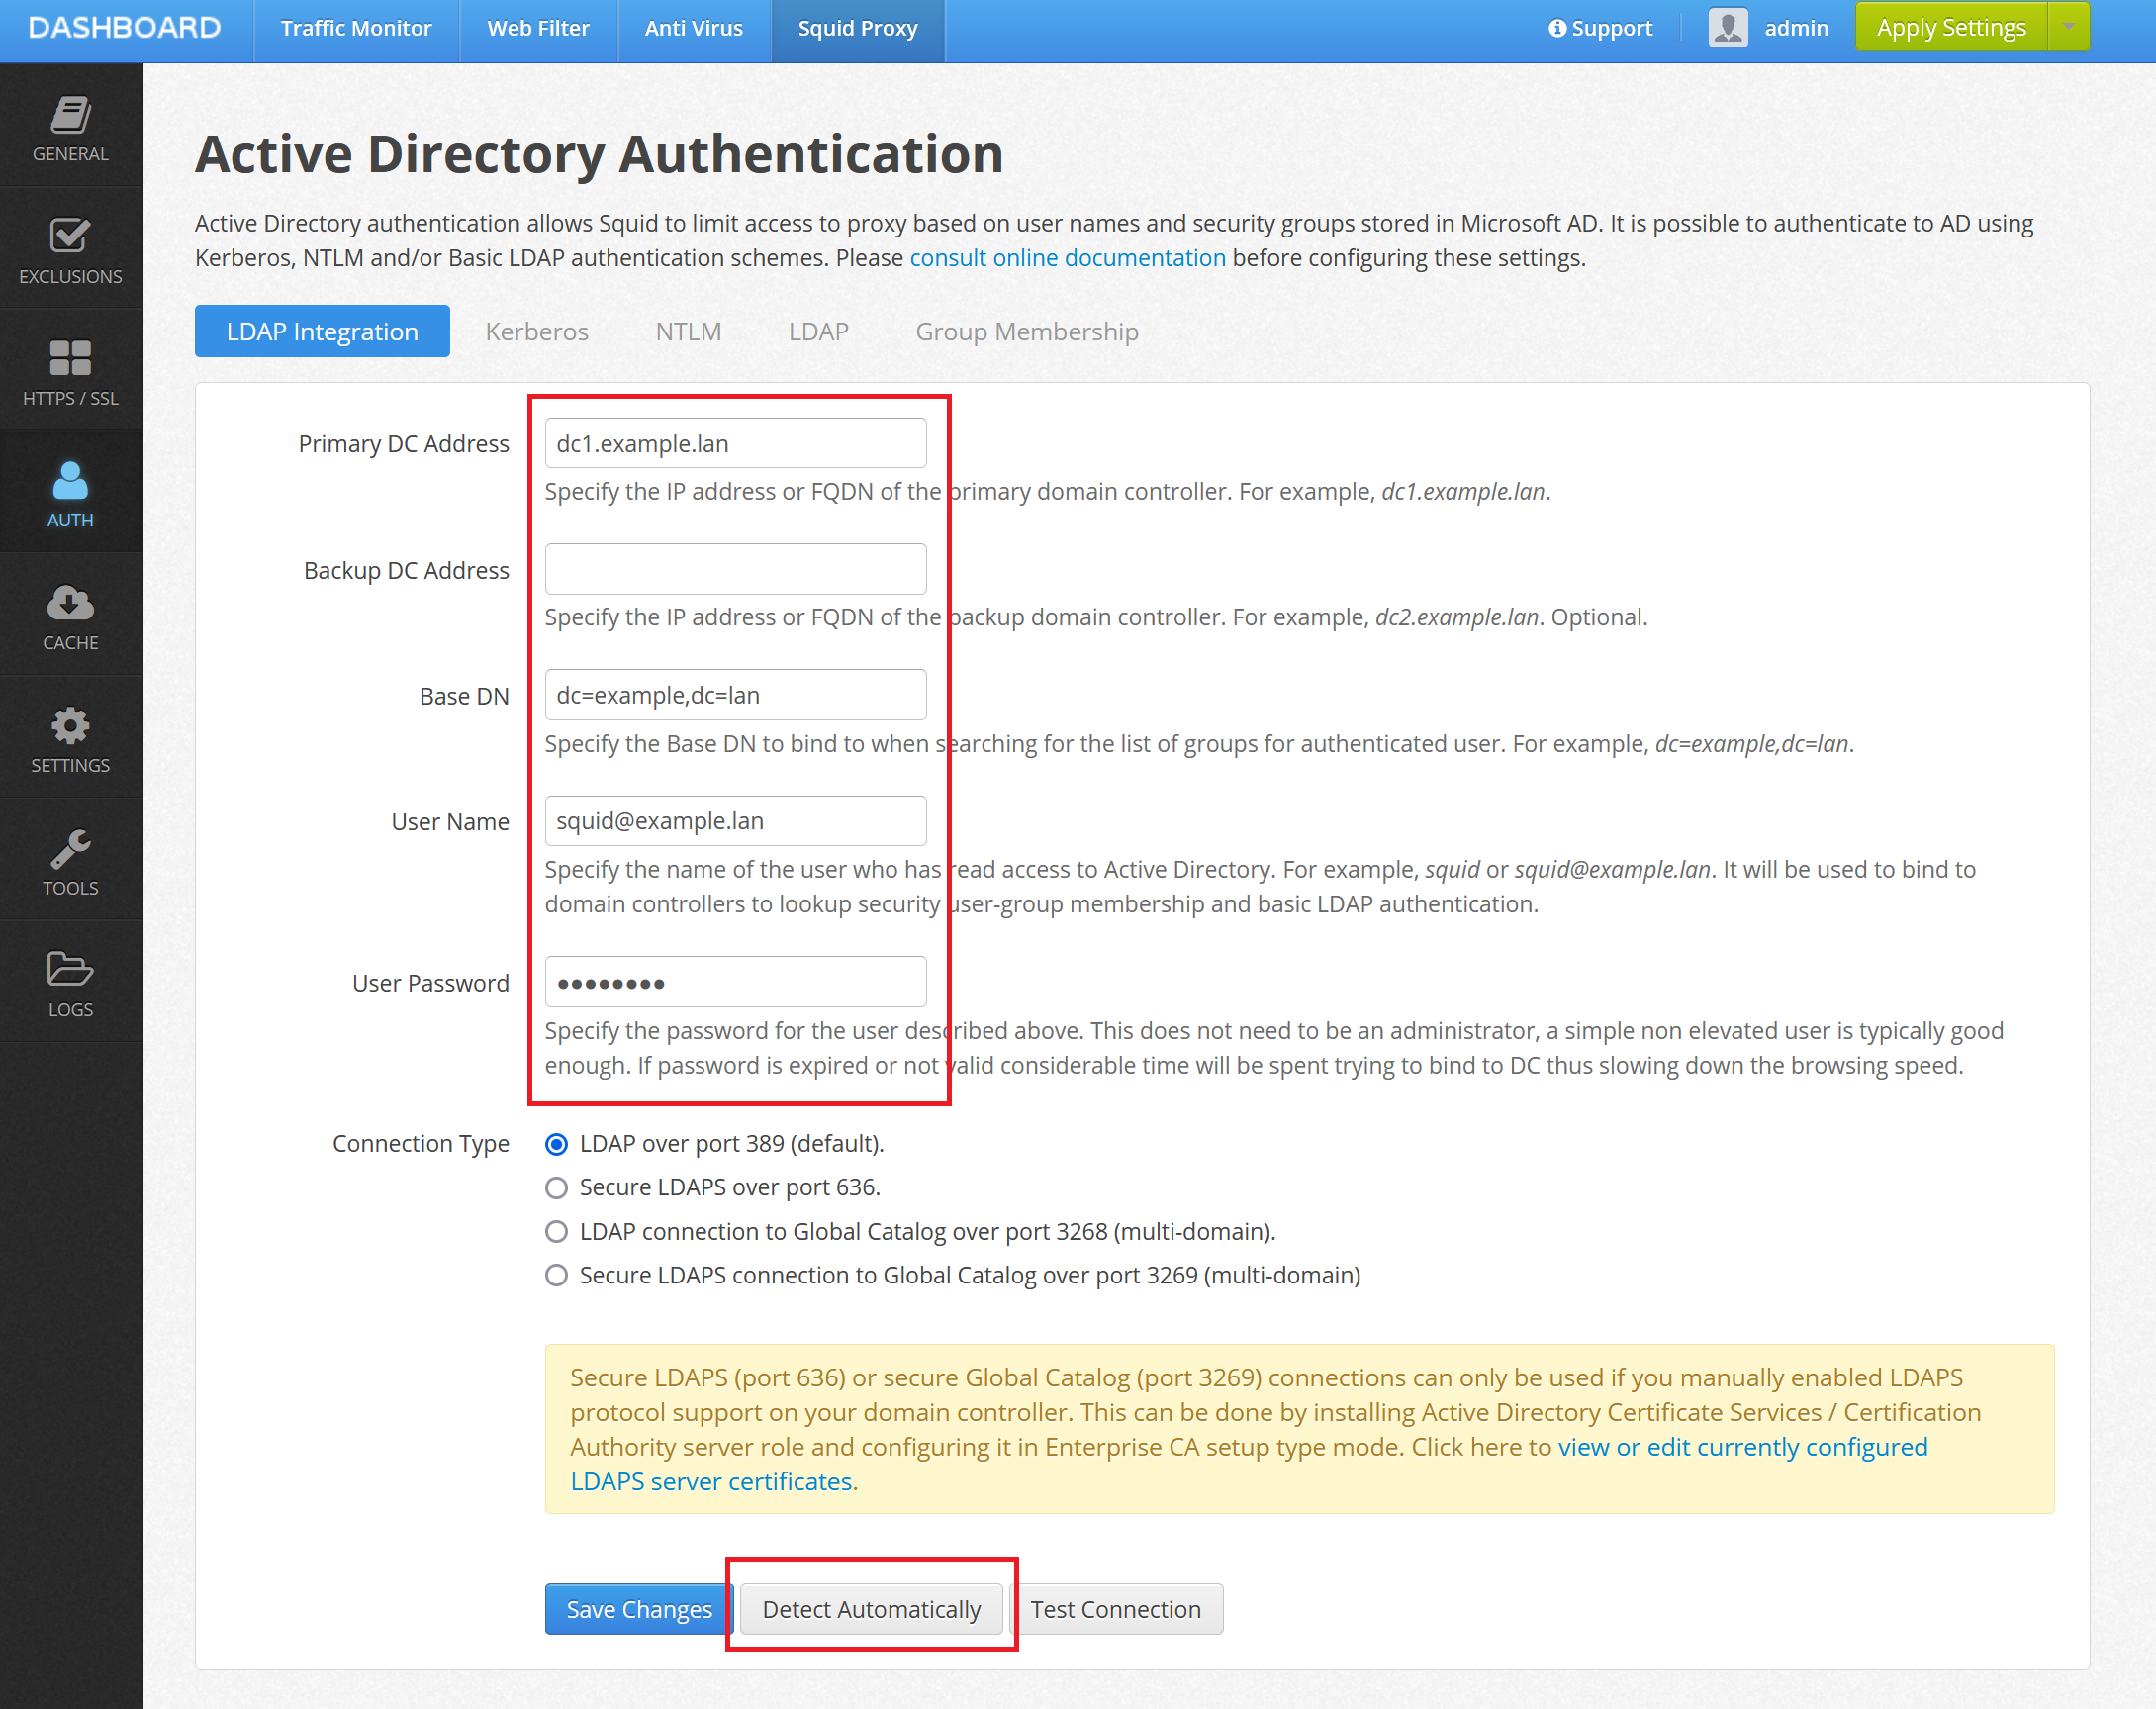
Open Admin UI / Squid Proxy / Auth and click on the Active Directory tab. The following information has to be provided for the authentication to work correctly. Click the Detect Automatically button at the bottom of the page to try guessing the settings based on your environment.
FQDN of primary DC
Fully qualified domain name or IP address of your first domain controller. For example, dc1.example.lan.
FQDN of secondary DC
Fully qualified domain name or IP address of your second domain controller. For example, dc2.example.lan. This setting is optional and does not need to always be filled in. If your first domain controller goes down for routine maintenance the application will use second domain controller for LDAP group lookup and authentication.
Base DN
The root of your LDAP tree. When you click Detect Automatically the application tries to do the anonymous bind to a domain controller to get this information from there. Very often the automatically detected value will be correct.
User name and password
This is the name and password of the designated user in Active Directory you have created on the previous step, see Step 3. Create User for Kerberos and LDAP authentication. NOTE that on operating systems other than Ubuntu you might need to type squid@example.lan as user name, not just squid as indicated on the following screenshots. Use Test Connection button to find the right spelling for the user name.
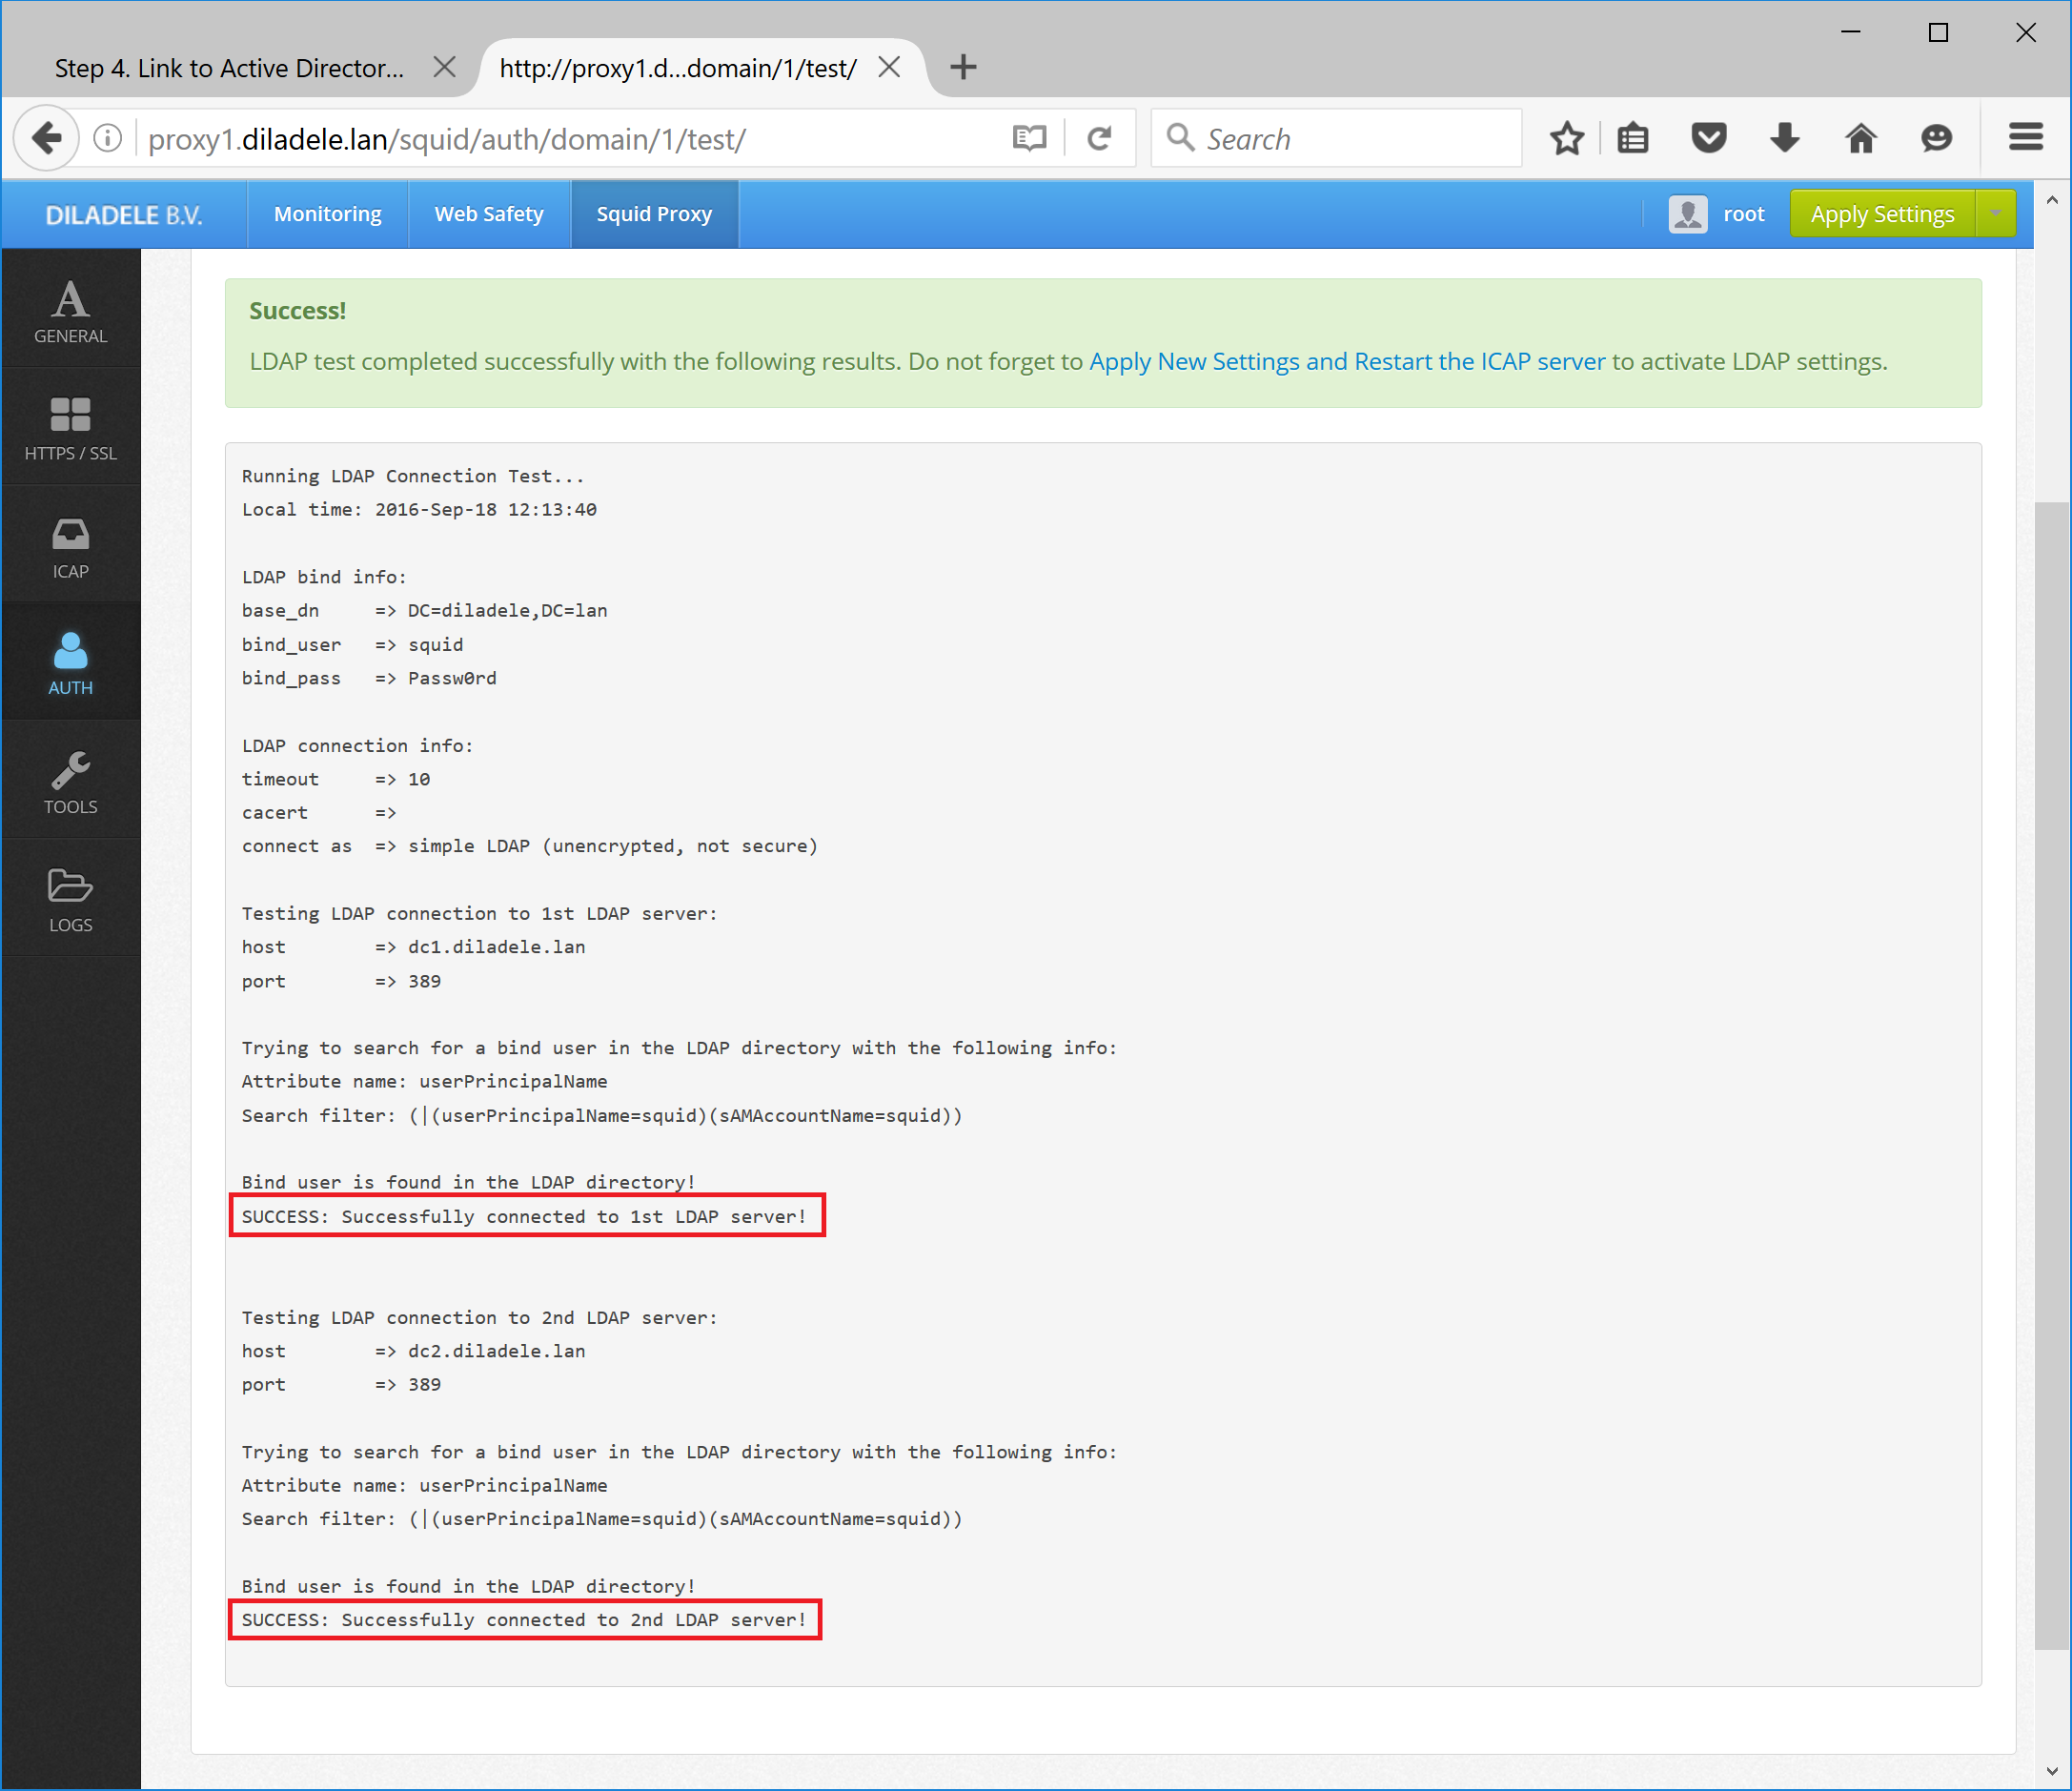
After you have provided the information about your domain and clicked Save Changes button, it is advisable to also click Test Connection button. This ensures the connection from proxy to domain controllers works as expected. If everything is fine the following screen will be displayed. If something is wrongly configured the result will be shown in red with output describing problems encountered. You must resolve all the problems before continuing further.
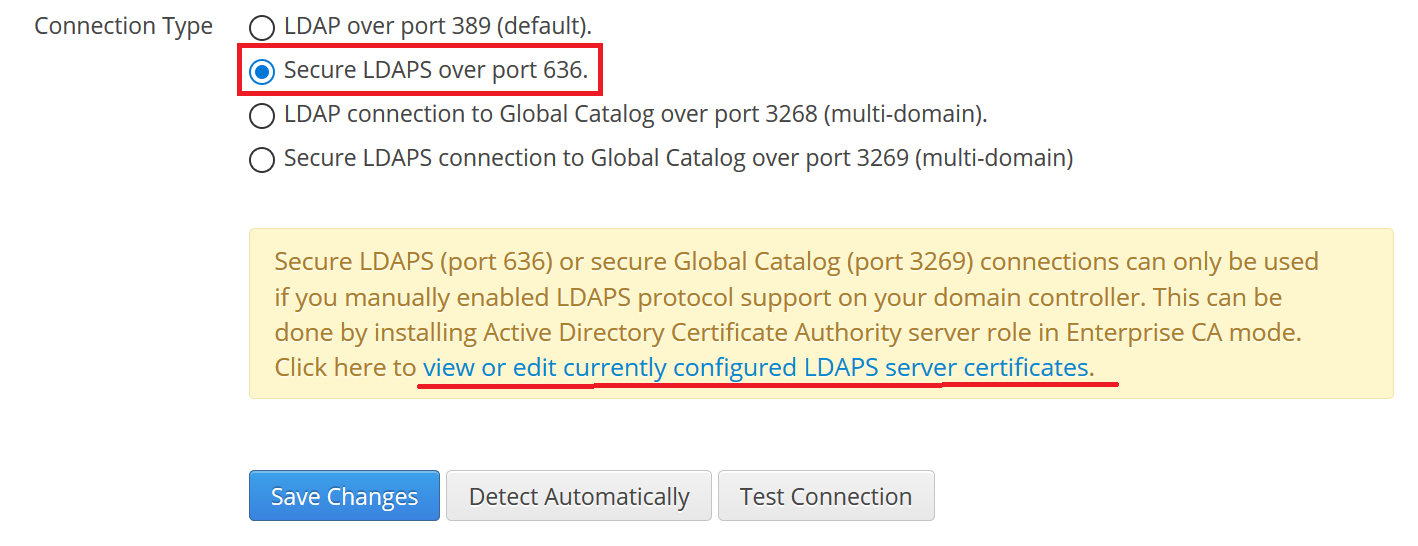
When application does the policy group lookup in Active Directory it connects to remote LDAP port 389 over insecure connection. To use secure LDAP (so called LDAPS) you need to set the radio box as indicated on the following screenshot.
Note
The LDAPS protocol support is disabled by default in Microsoft Active Directory and you need to install Enterprise CA role on your domain controllers to enable LDAPS. The following link may prove to be helpful https://social.technet.microsoft.com/wiki/contents/articles/2980.ldap-over-ssl-ldaps-certificate.aspx.
After you did that, also click on View or edit currently configured LDAPS certificates and click on Detect automatically as indicated on the screenshot below. Warning - your LDAPS connection will not work until you see correct information over the server LDAPS certificate as indicated on screenshot below.
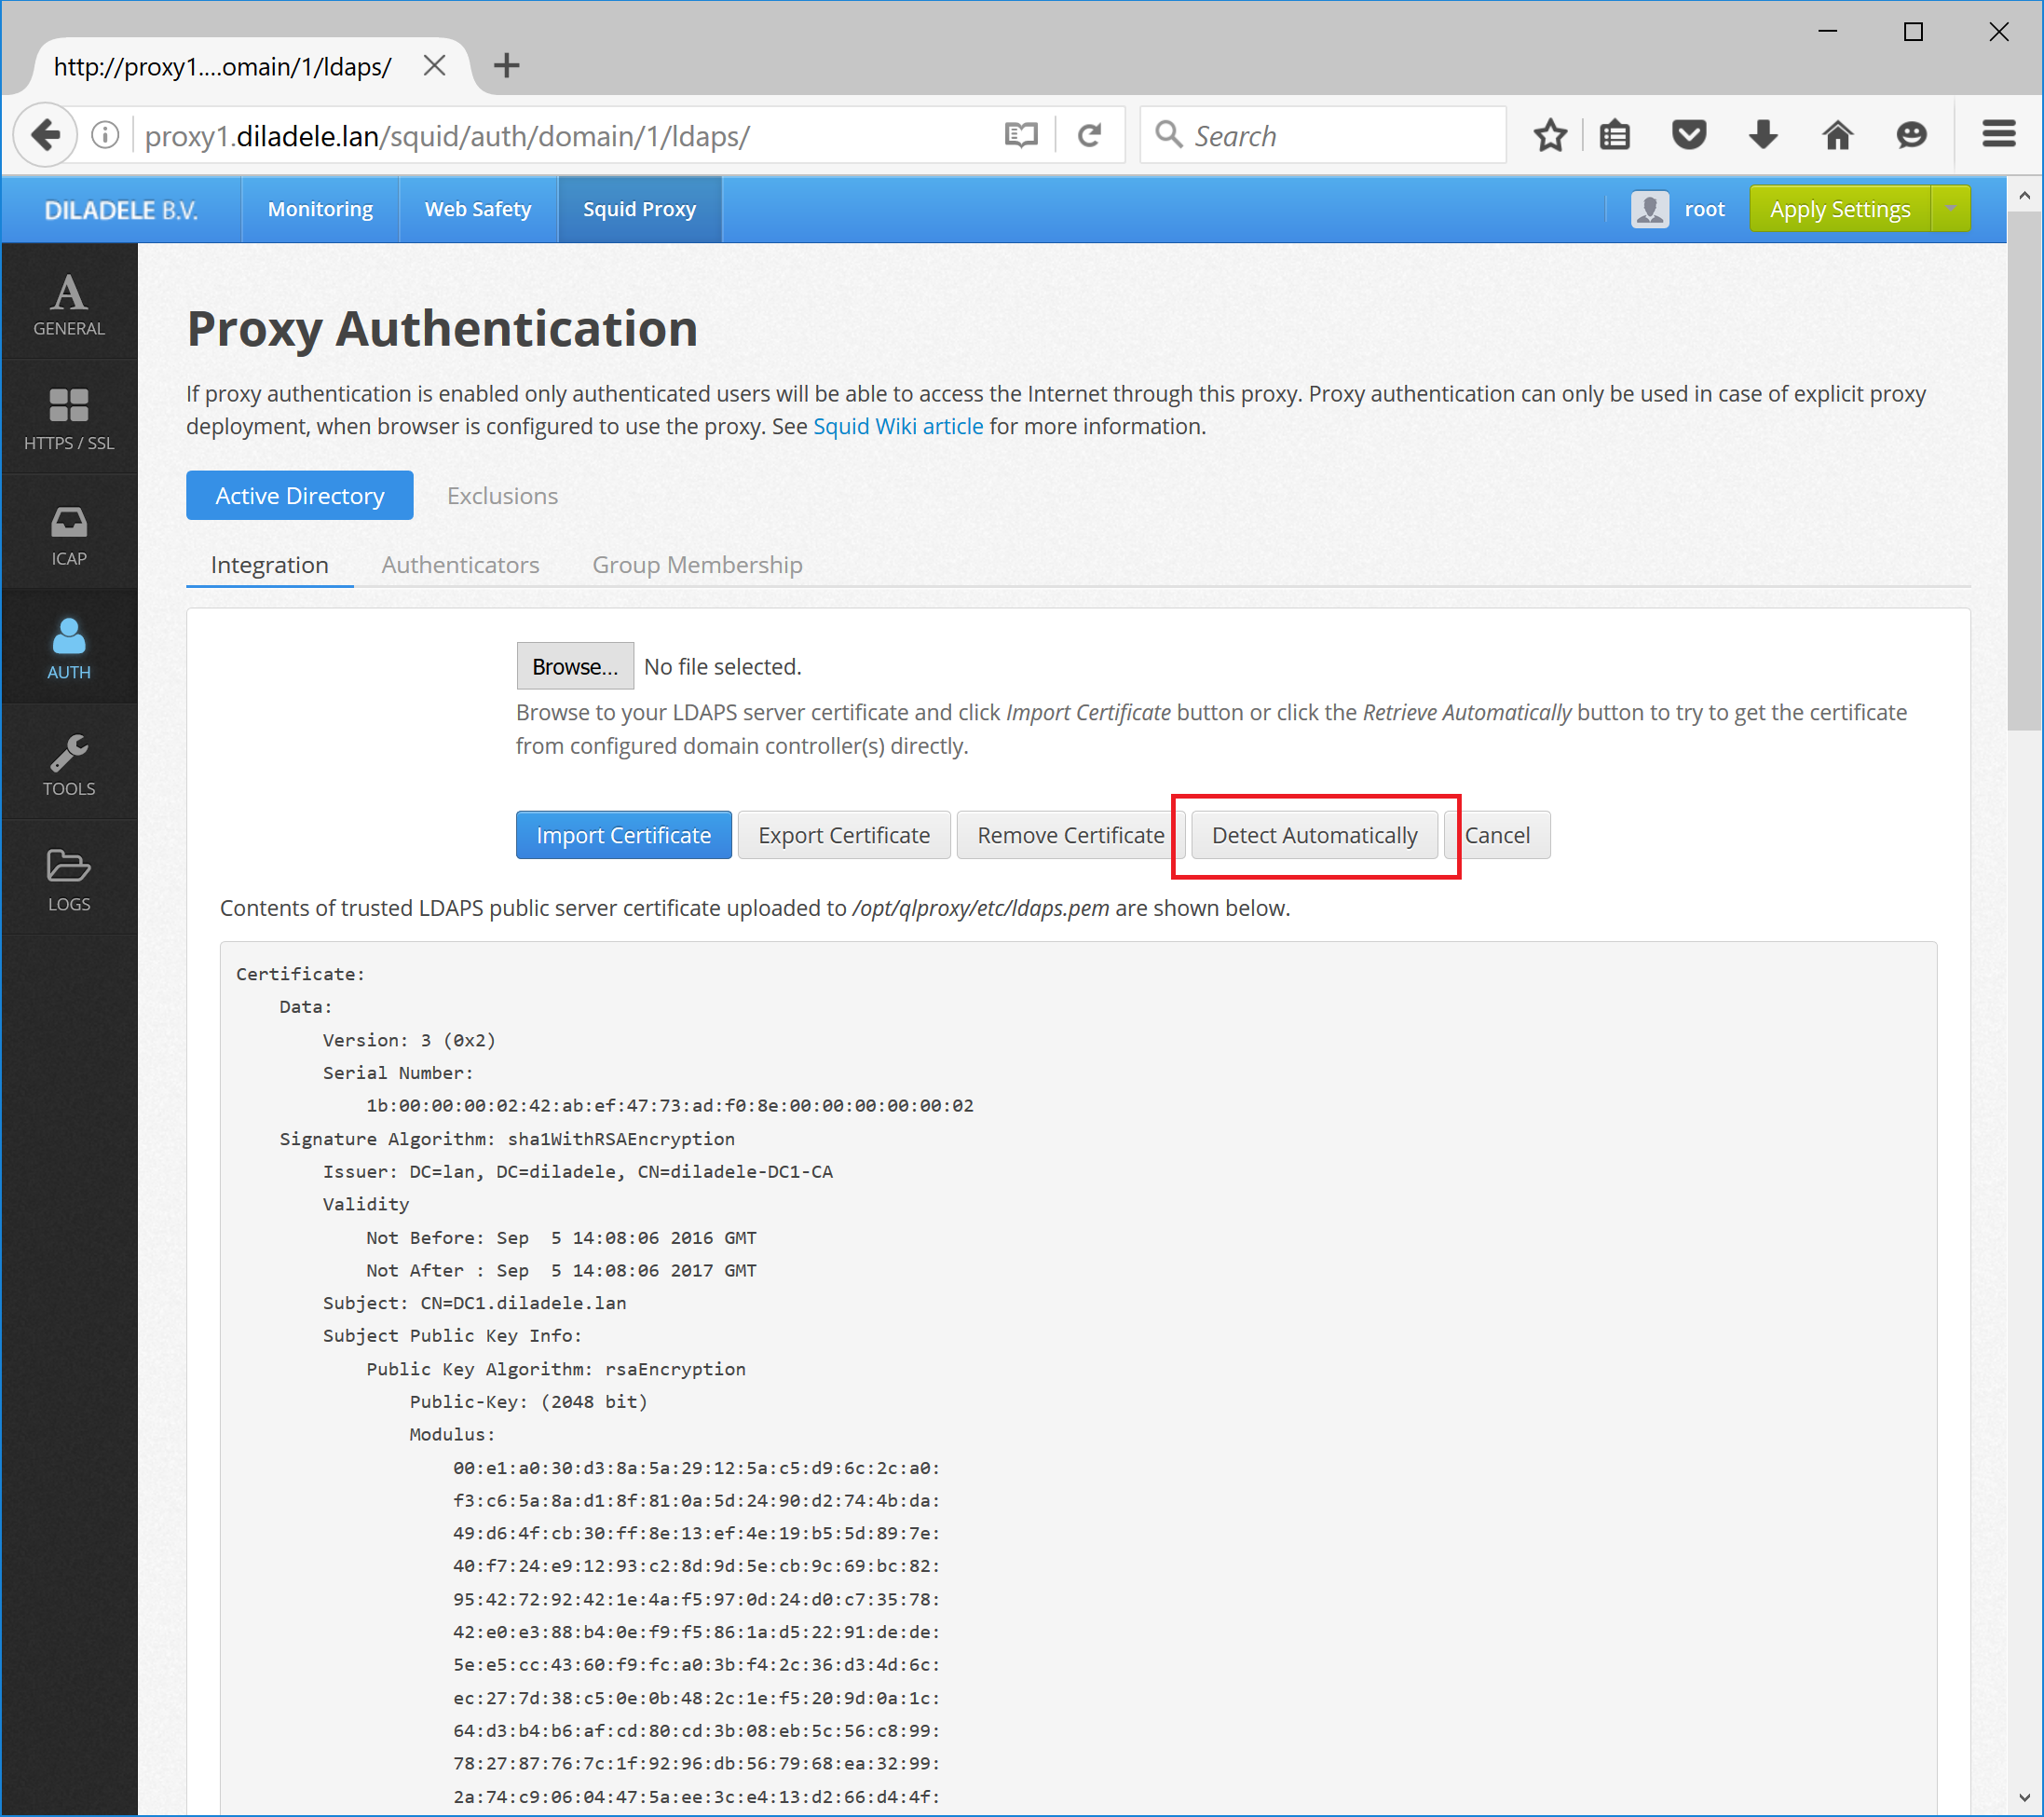
Do not forget to Test Connection after you enable LDAPS protocol support!