Step 1. Configure IP address and DNS settings
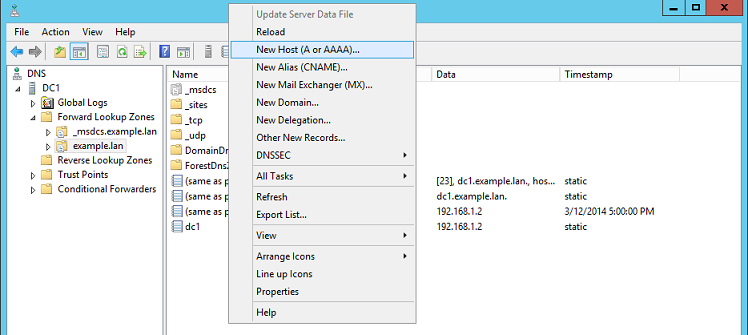
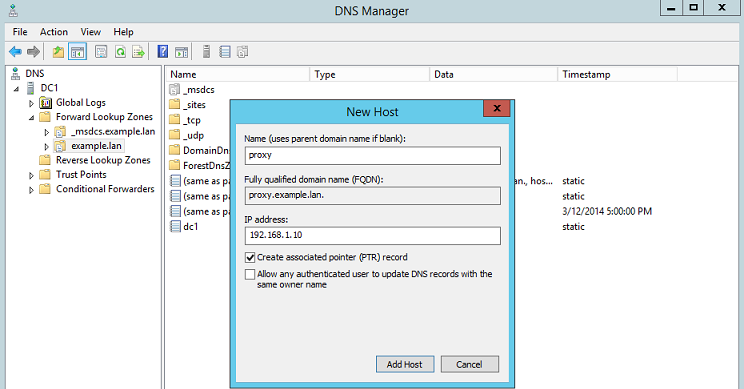
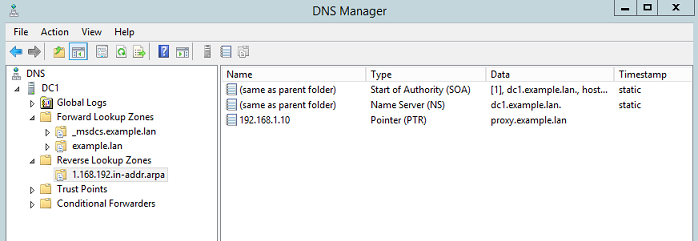
Create A and PTR records for proxy.example.lan on your DNS server. Make sure Windows workstations can resolve proxy.example.lan name to 192.168.1.10 and 192.168.1.10 can be reversely resolved to proxy.example.lan.
then
then
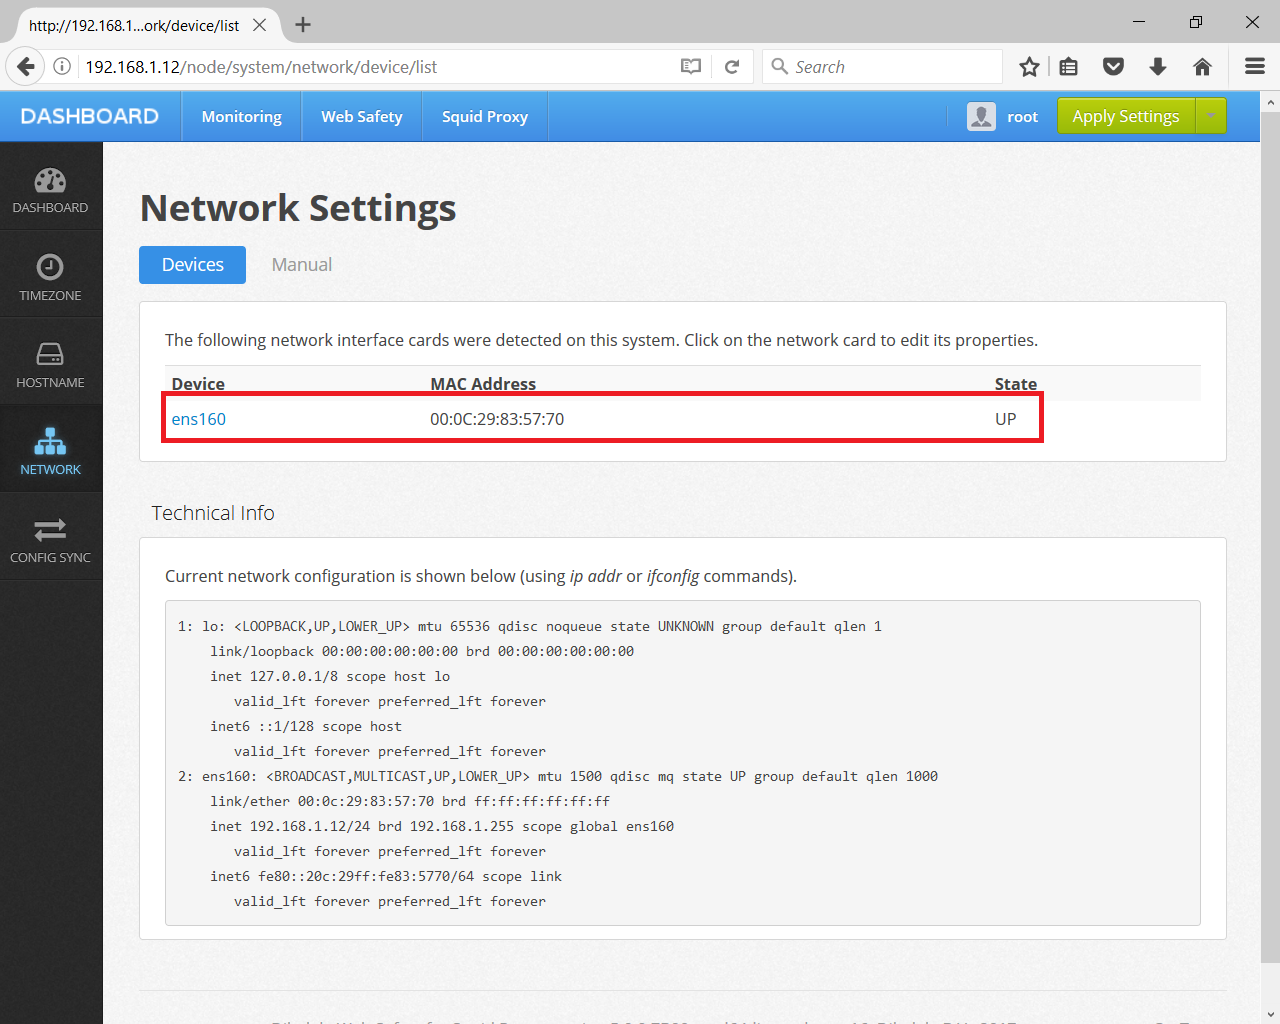
Your Squid proxy MUST be configured with static IP address, you can do it from UI as indicated on the following screenshot or manually as explained in article How to Set Static IP Address in VA.
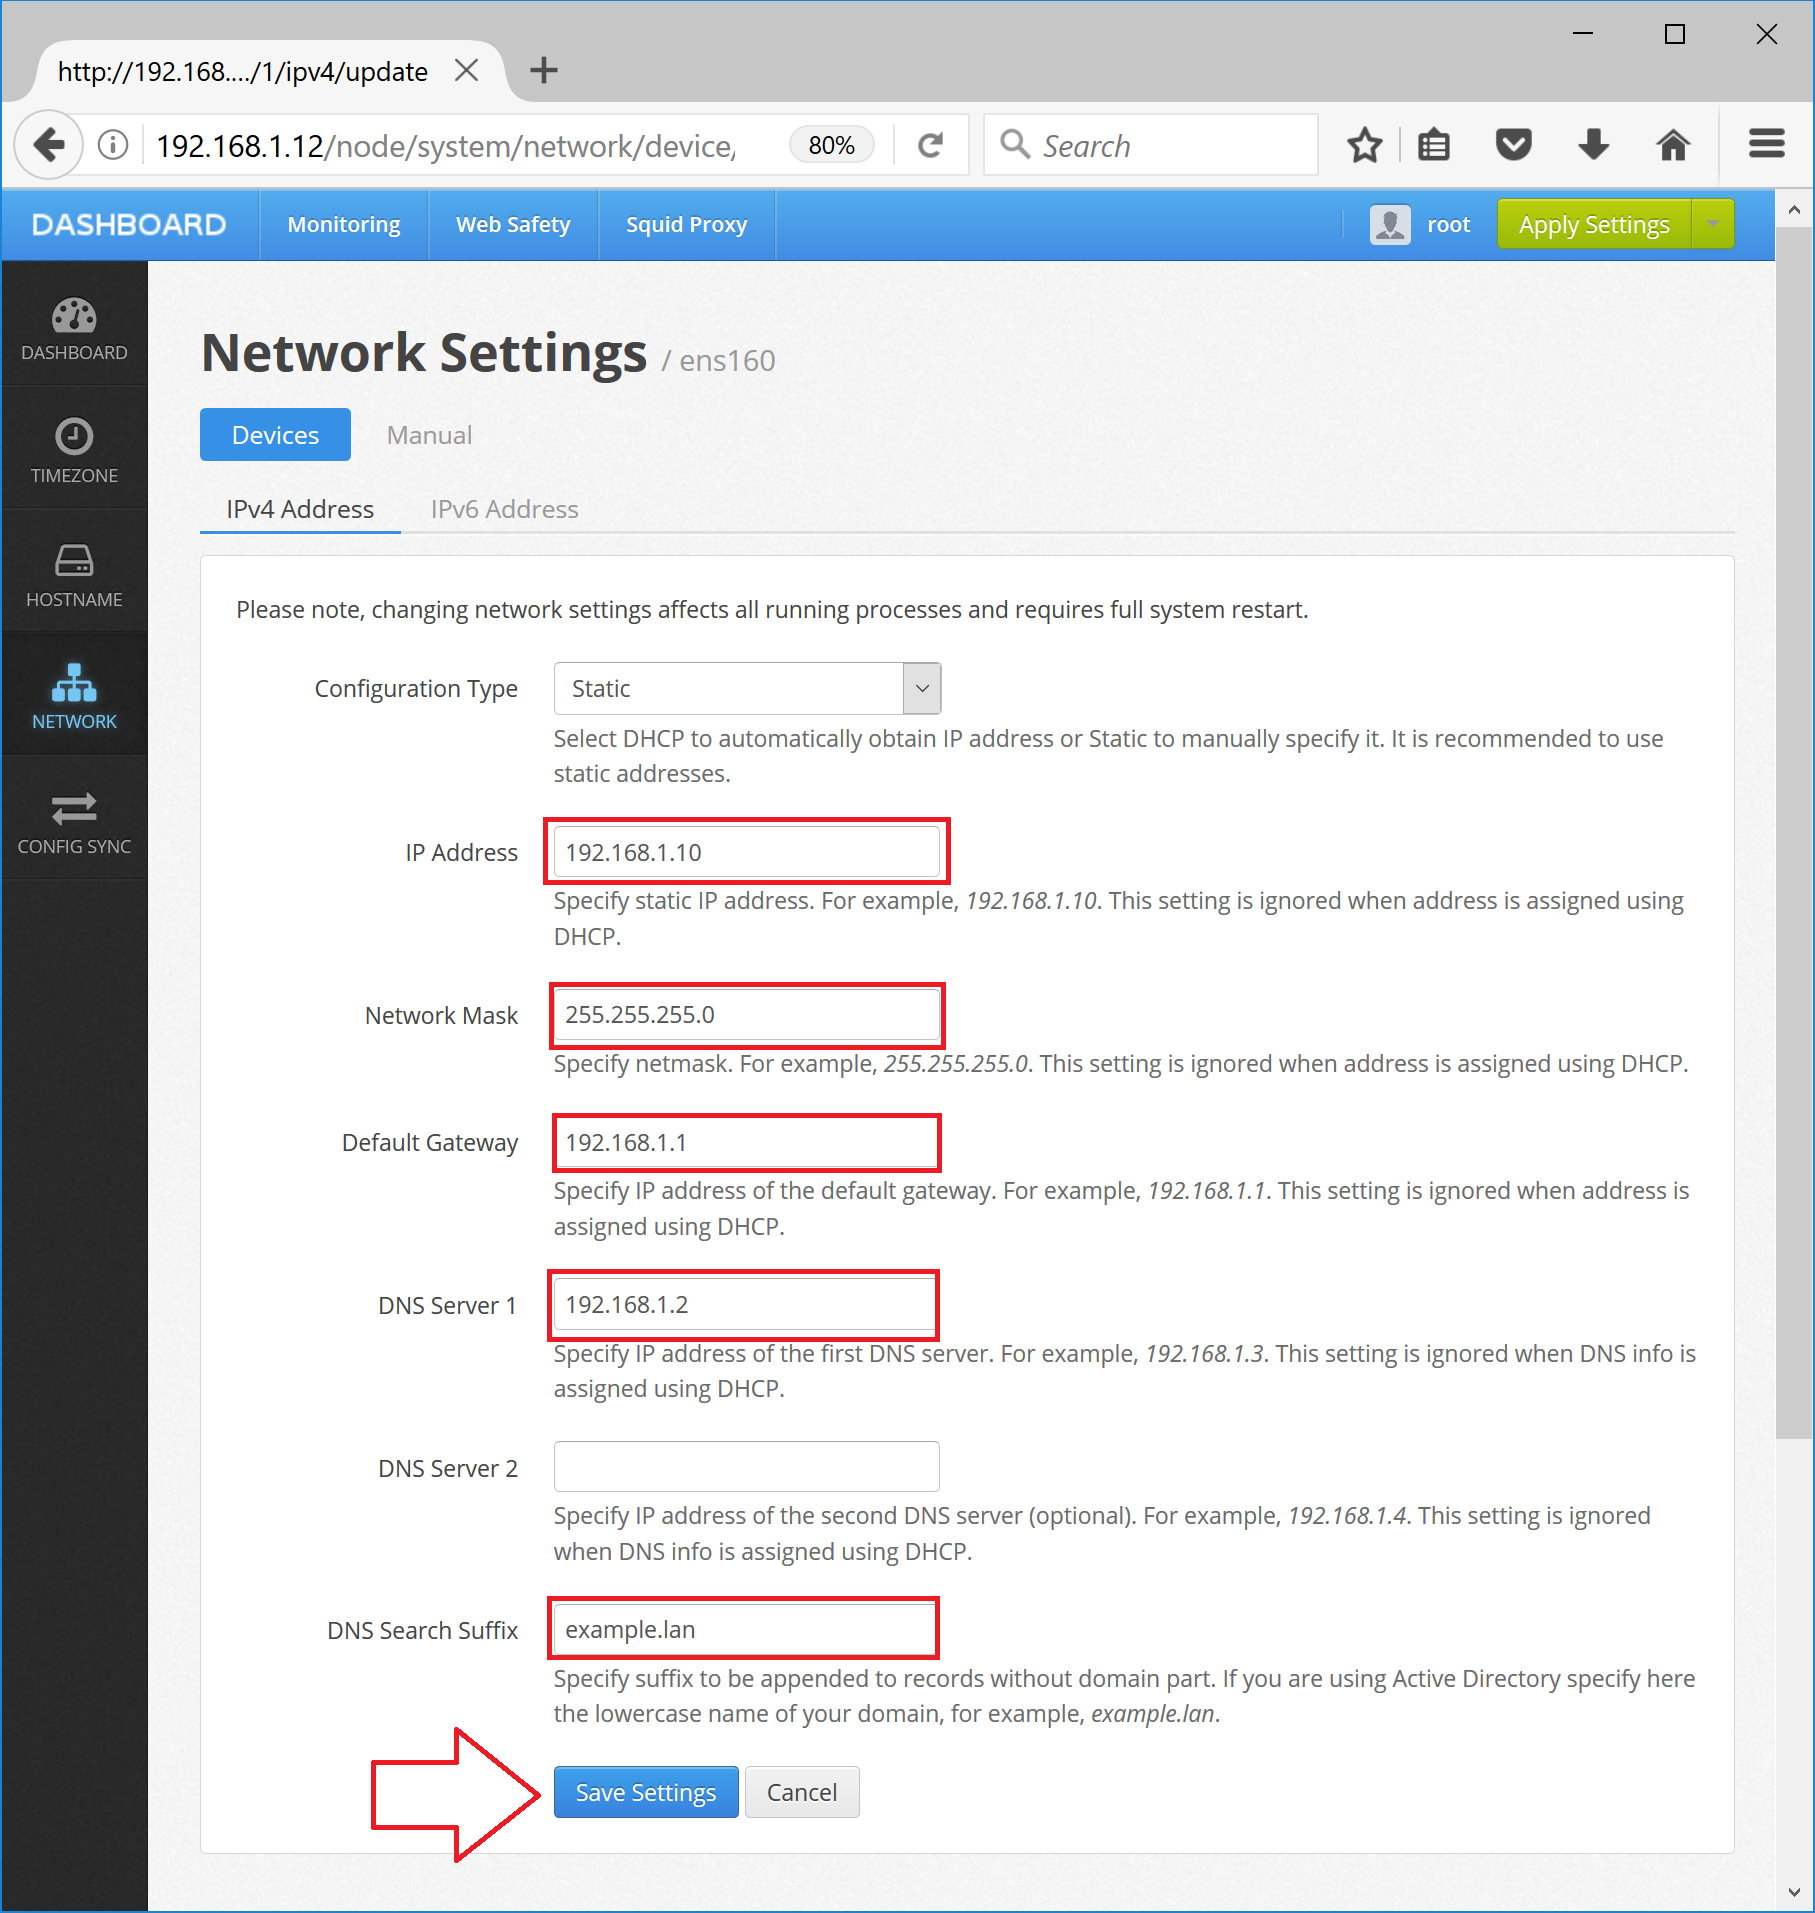
After you clicked Save Settings, UI will automatically generate the /etc/netplan/00-installer-config.yaml with the following contents.
network:
      ethernets:
        ens160:
          addresses:
          - 192.168.1.10/24
          gateway4: 192.168.1.1
          nameservers:
            addresses:
            - 192.168.1.2
            search:
            - example.lan
      renderer: networkd
      version: 2
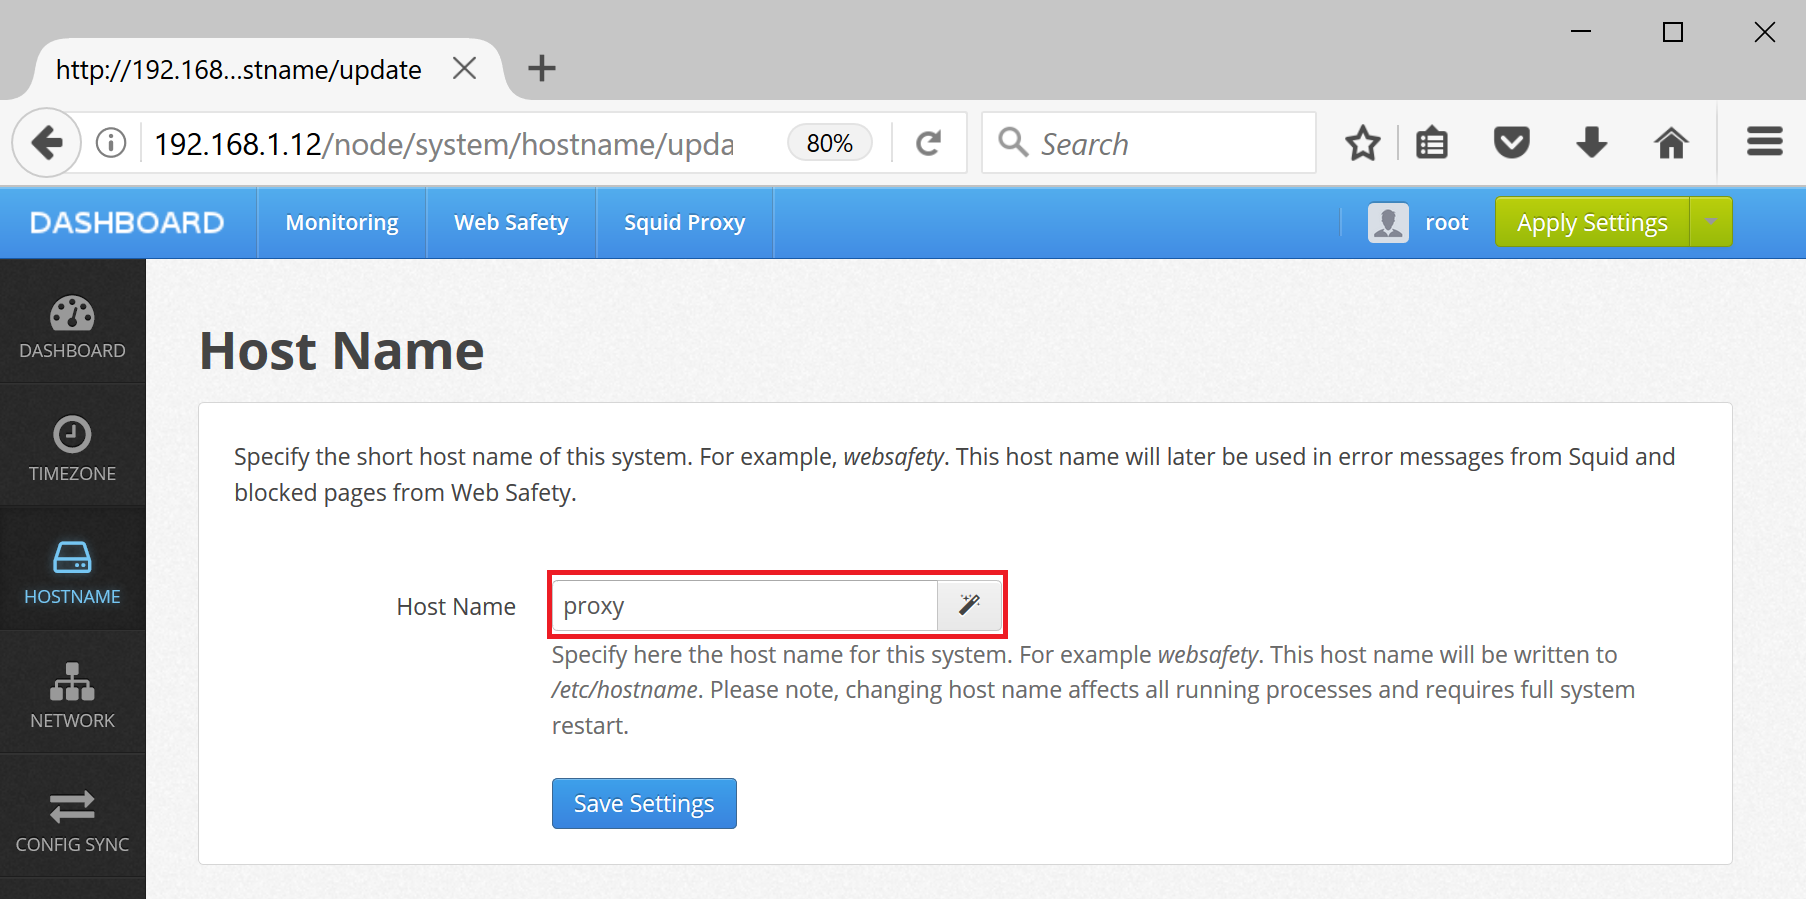
Next, set host name of your proxy from Admin UI as inidicated on the following screenshot or by editing the /etc/hostname file to contain a single word proxy.
Set DNS reverse resolve setting on your proxy by editing /etc/hosts to look like the following.
127.0.0.1       localhost
192.168.1.10    proxy.example.lan proxy

# The following lines are desirable for IPv6 capable hosts
::1     localhost ip6-localhost ip6-loopback
ff02::1 ip6-allnodes
ff02::2 ip6-allrouters
Reboot your proxy and after restart, check the output of hostname -f command; it should give proxy.example.lan.
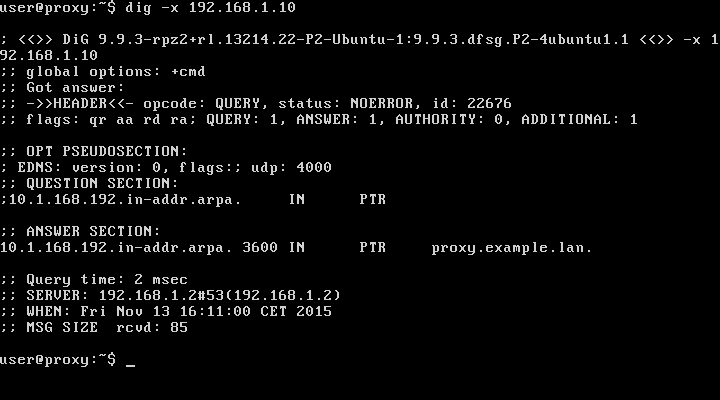
Now check you can resolve domain names on proxy by running the following commands. Output from these commands should contain correct IP addresses and fully qualified domain names for proxy.example.lan and dc1.example.lan.
$ dig dc1.example.lan
$ dig -x 192.168.1.2
$ dig proxy.example.lan
$ dig -x 192.168.1.10
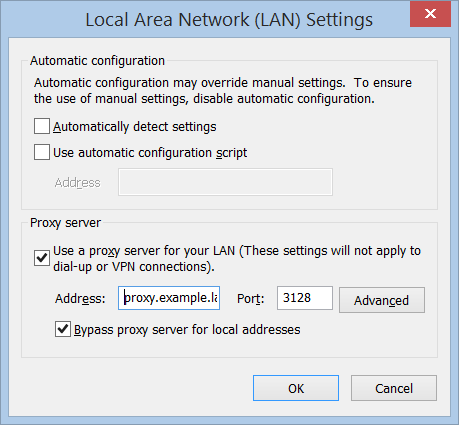
Specify proxy.example.lan (as FQDN and not as IP address!!!) in your browser settings on all your workstation machines. Try browsing to see if Squid works nicely without authentication.